Installing Cloudera Data Services on premises using Cloudera Embedded Container Service
Install Cloudera Data Services on premises using the Cloudera Embedded Container Service.
- In the Cloudera Manager WebUI, the remote_repo_override_user and remote_repo_override_password parameters must contain valid credentials for archive.cloudera.com before any upgrades or installation of Cloudera Embedded Container Service.
- When deploying an Cloudera Embedded Container Service cluster, the batch size limitation for adding Cloudera Embedded Container Service agent nodes to Cloudera Embedded Container Service cluster is under 50. If the requirement is to deploy an Cloudera Embedded Container Service cluster with more than 50 nodes, Cloudera recommends starting the initial deployment with less than 50 nodes and incrementally add nodes to the cluster after the first installation succeeds.
- Before configuring Cluster IP Range (cluster-cidr) and Service IP Range (service-cidr), you must review best practices at the Suse website. After your cluster is deployed, these values cannot change. Any misconfiguration will require decommissioning the cluster and redeploying it to correct the settings.
-
In Cloudera Manager UI, click Data
Services in the left navigation pane.
Figure 1. Cloudera Manager Home page 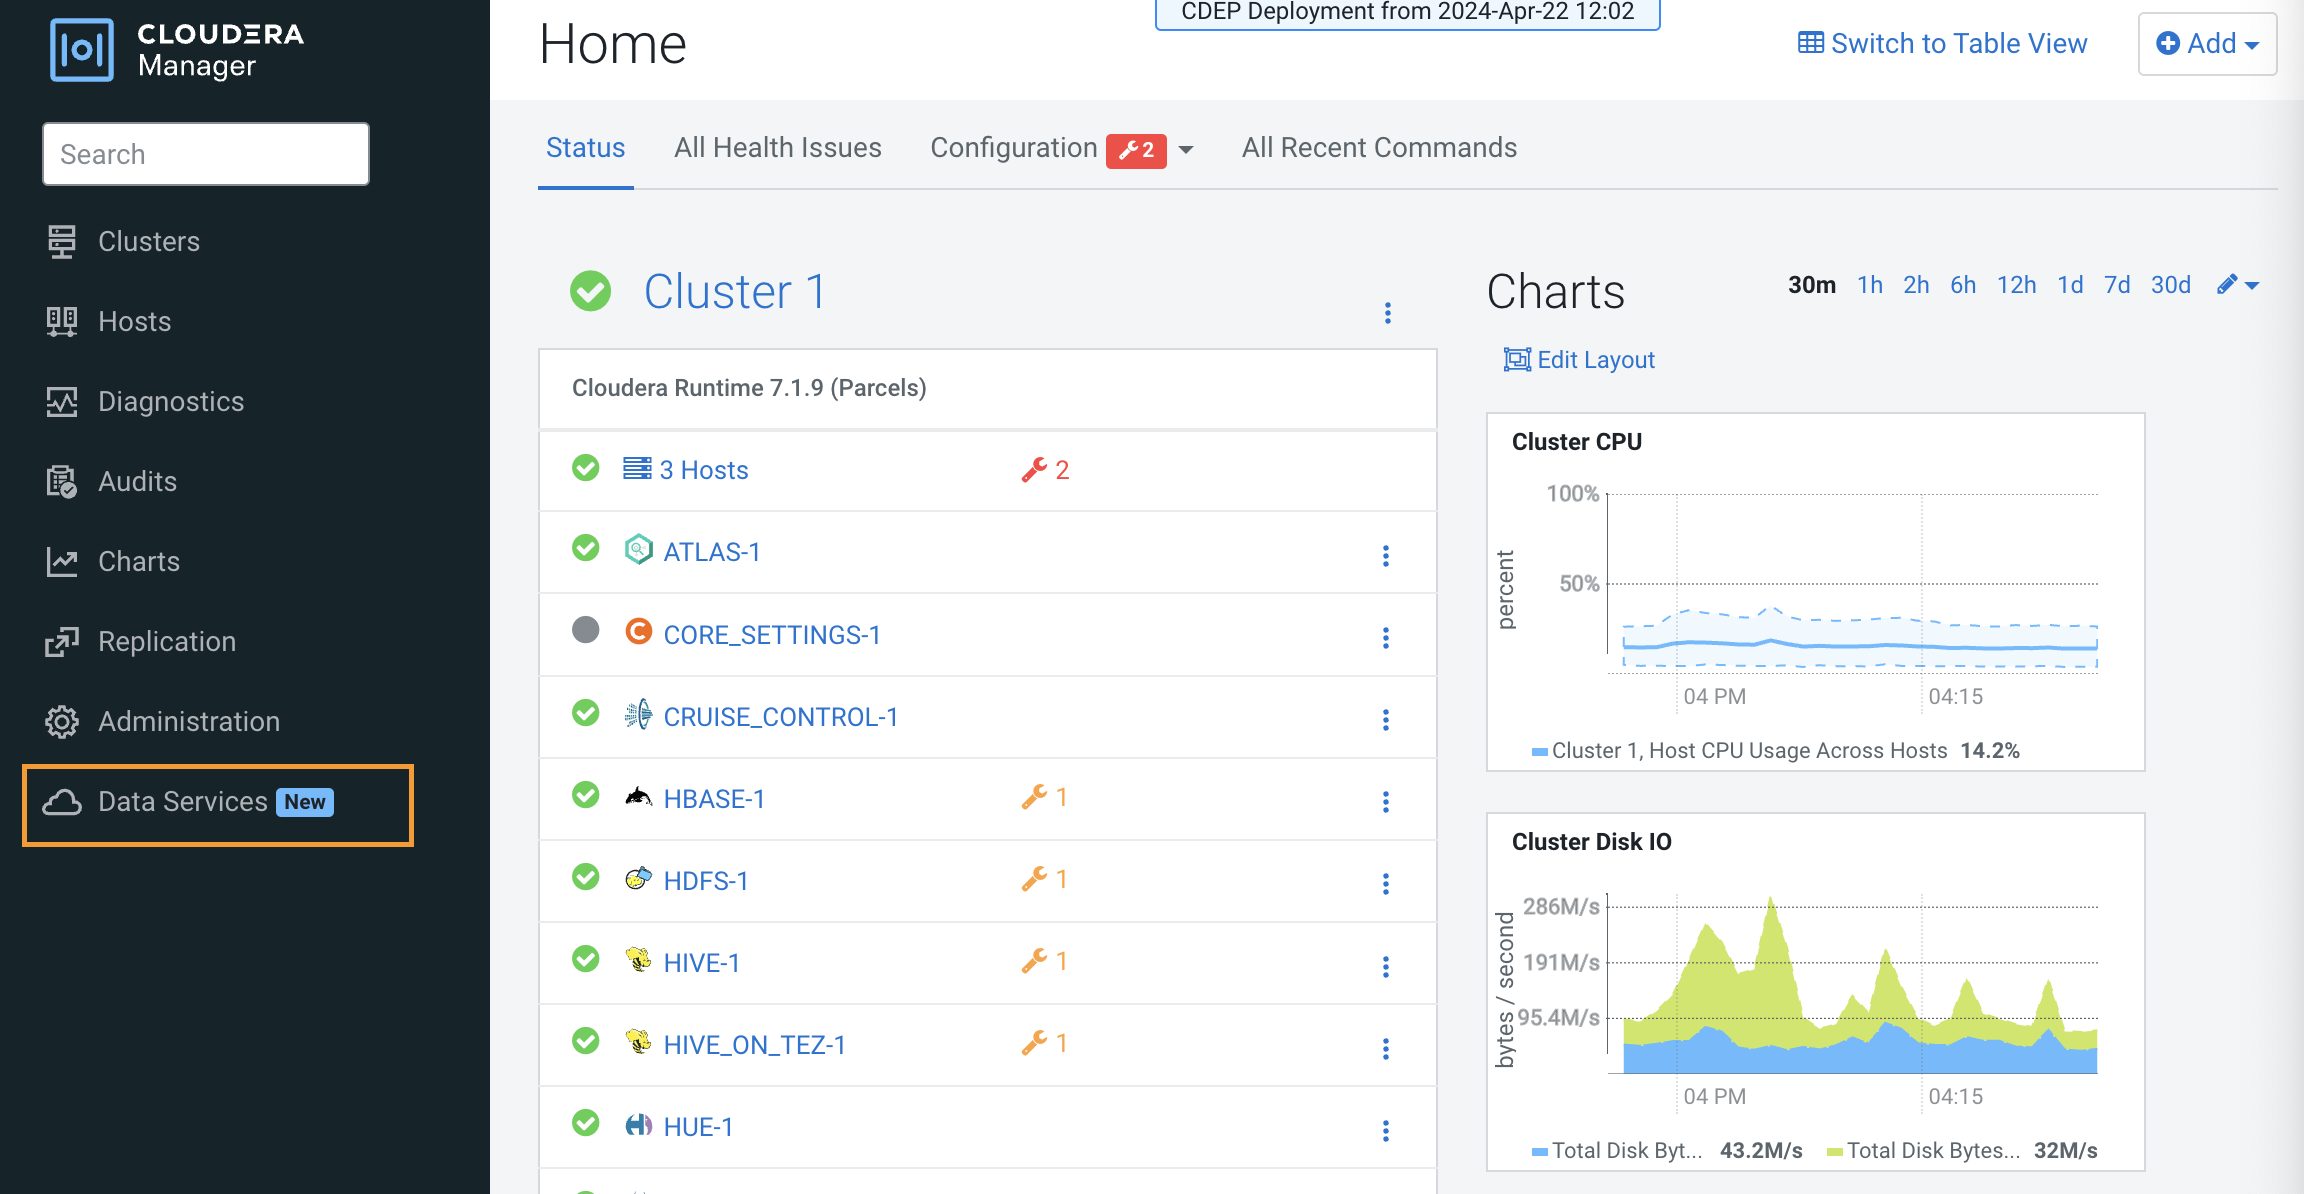
-
The Add Cloudera on Premises Containerized Cluster page is
displayed. Click Continue
.
Figure 2. Add Cloudera on Premises Containerized Cluster page 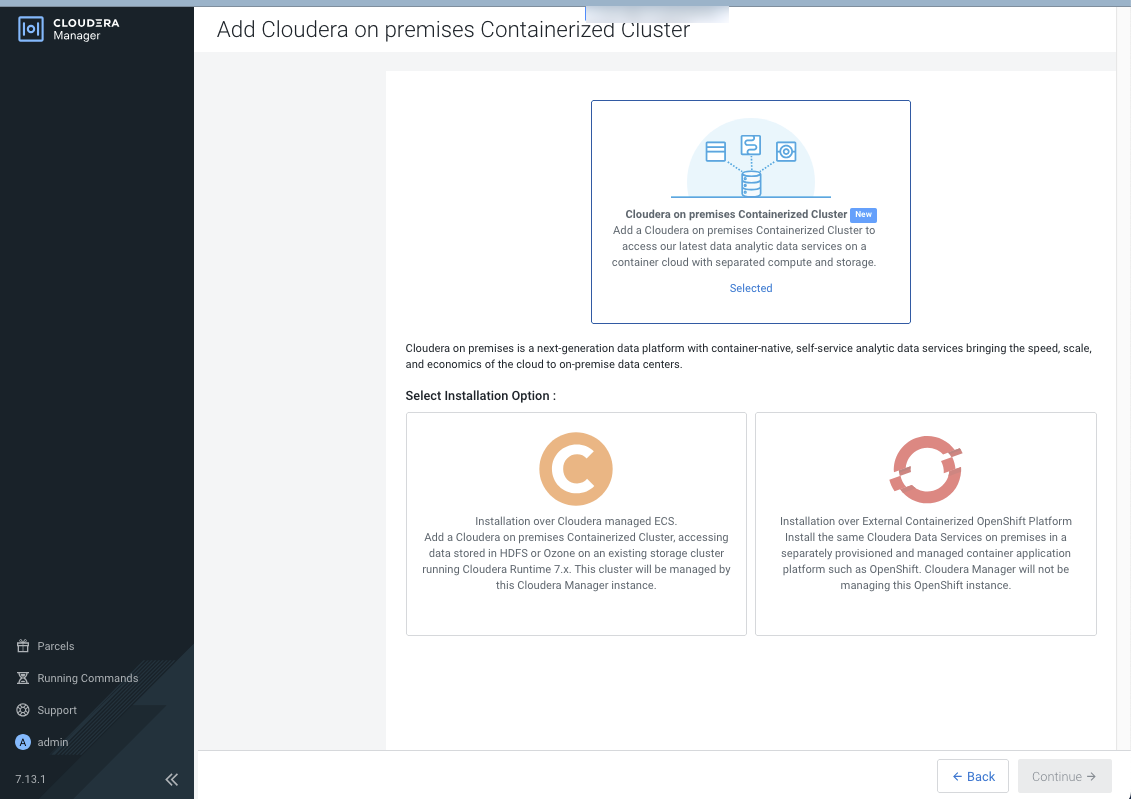
-
On the Getting Started page of the installation wizard,
select Internet or Air Gapped as
the Install Method.
- Select the Internet installation method.
- Click Custom Repository to use a custom repository link provided by Cloudera.
Figure 3. Getting Started page with the Internet Install Method selected 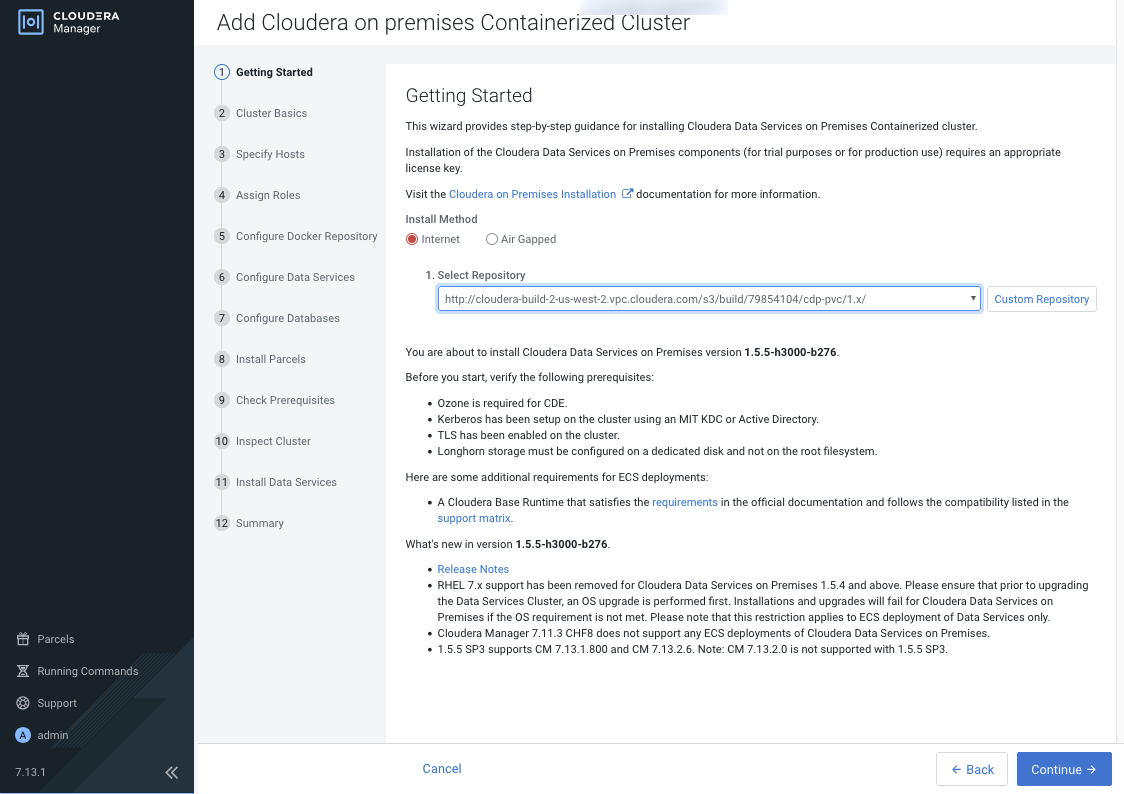
Figure 4. Getting Started page with the Air-gapped Install Method selected 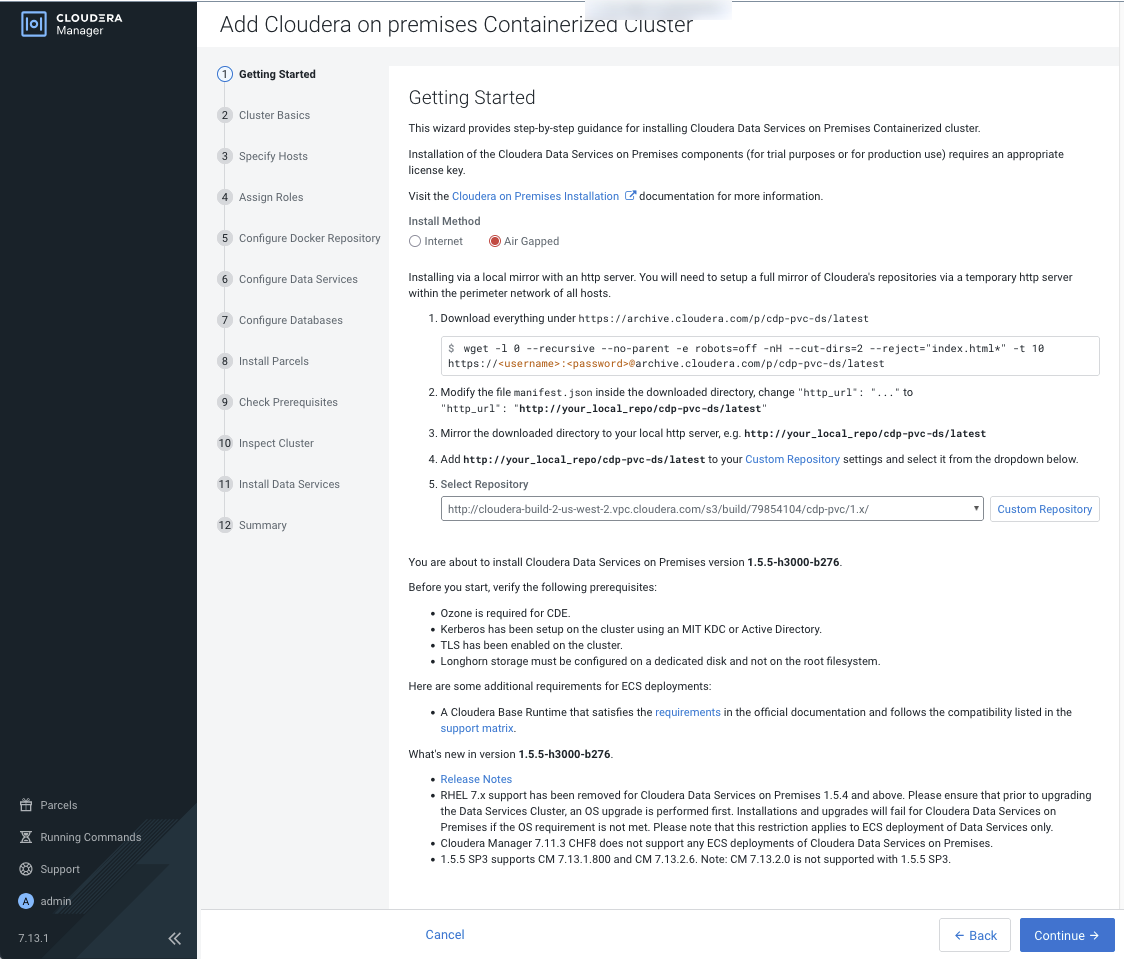
- Select the Air Gapped install option.
Download everything under from https://archive.cloudera.com/p/cdp-pvc-ds/latest.
To download only the required images, use the following script:wget -l 0 --recursive --no-parent -e robots=off -nH --cut-dirs=2 --reject="index.html*" -t 10 https://<username>:<password>@archive.cloudera.com/p/cdp-pvc-ds/latest/DSPATH=<https://<username>>:<password>@archive.cloudera.com/p/cdp-pvc-ds/latest IMGPATH=${DSPATH}/images/wget ${DSPATH}/manifest.json wget ${DSPATH}/cdp-private*.tgz wget -r -nc --no-parent -A * ${DSPATH}/parcels wget -r -nc --no-parent -A a*.tar.gz $IMGPATH wget -r -nc --no-parent -A u*.tar.gz $IMGPATH wget -r -nc --no-parent -A v*.tar.gz $IMGPATH wget -r -nc --no-parent -A w*.tar.gz $IMGPATH wget -r -nc --no-parent -A y*.tar.gz $IMGPATH wget -r -nc --no-parent -A c*.tar.gz $IMGPATH wget -r -nc --no-parent -A e*.tar.gz $IMGPATH wget -r -nc --no-parent -A f*.tar.gz $IMGPATH wget -r -nc --no-parent -A i*.tar.gz $IMGPATH wget -r -nc --no-parent -A j*.tar.gz $IMGPATH wget -r -nc --no-parent -A k*.tar.gz $IMGPATH wget -r -nc --no-parent -A o*.tar.gz $IMGPATH wget -r -nc --no-parent -A q*.tar.gz $IMGPATH wget -r -nc --no-parent -A w*.tar.gz $IMGPATH wget -r -nc --no-parent -A z*.tar.gz $IMGPATH wget -r -nc --no-parent -A b*.tar.gz -R boltz2*.tar.gz $IMGPATH wget -r -nc --no-parent -A d*.tar.gz -R deepseek*.tar.gz $IMGPATH wget -r -nc --no-parent -A g*.tar.gz -R gpt-oss*.tar.gz $IMGPATH wget -r -nc --no-parent -A h*.tar.gz -R hugging*.tar.gz $IMGPATH wget -r -nc --no-parent -A l*.tar.gz -R llama*.tar.gz $IMGPATH wget -r -nc --no-parent -A m*.tar.gz -R mix*.tar.gz,mis*.tar.gz $IMGPATH wget -r -nc --no-parent -A n*.tar.gz -R nemo*.tar.gz $IMGPATH wget -r -nc --no-parent -A p*.tar.gz -R paddle*.tar.gz $IMGPATH wget -r -nc --no-parent -A r*.tar.gz -R riva-asr*.tar.gz $IMGPATH wget -r -nc --no-parent -A s*.tar.gz -R starcoder2*.tar.gz $IMGPATH wget -r -nc --no-parent -A t*.tar.gz -R triton*.tar.gz $IMGPATH wget -r -nc --no-parent -A *.tar.gz.asc $IMGPATH-
Edit the manifest.json file in the downloaded directory. Change
"http_url": "..."to"http_url": "http://your_local_repo/cdp-pvc-ds/latest". -
Mirror the downloaded directory to your local HTTP server, for example, to
http://your_local_repo/cdp-pvc-ds/latest. -
Click Custom Repository and add
http://your_local_repo/cdp-pvc-ds/latestas a custom repository. - From the Select Repository drop-down menu
select
http://your_local_repo/cdp-pvc-ds/latest.
Figure 5. Getting Started page with the Air Gapped Install Method selected 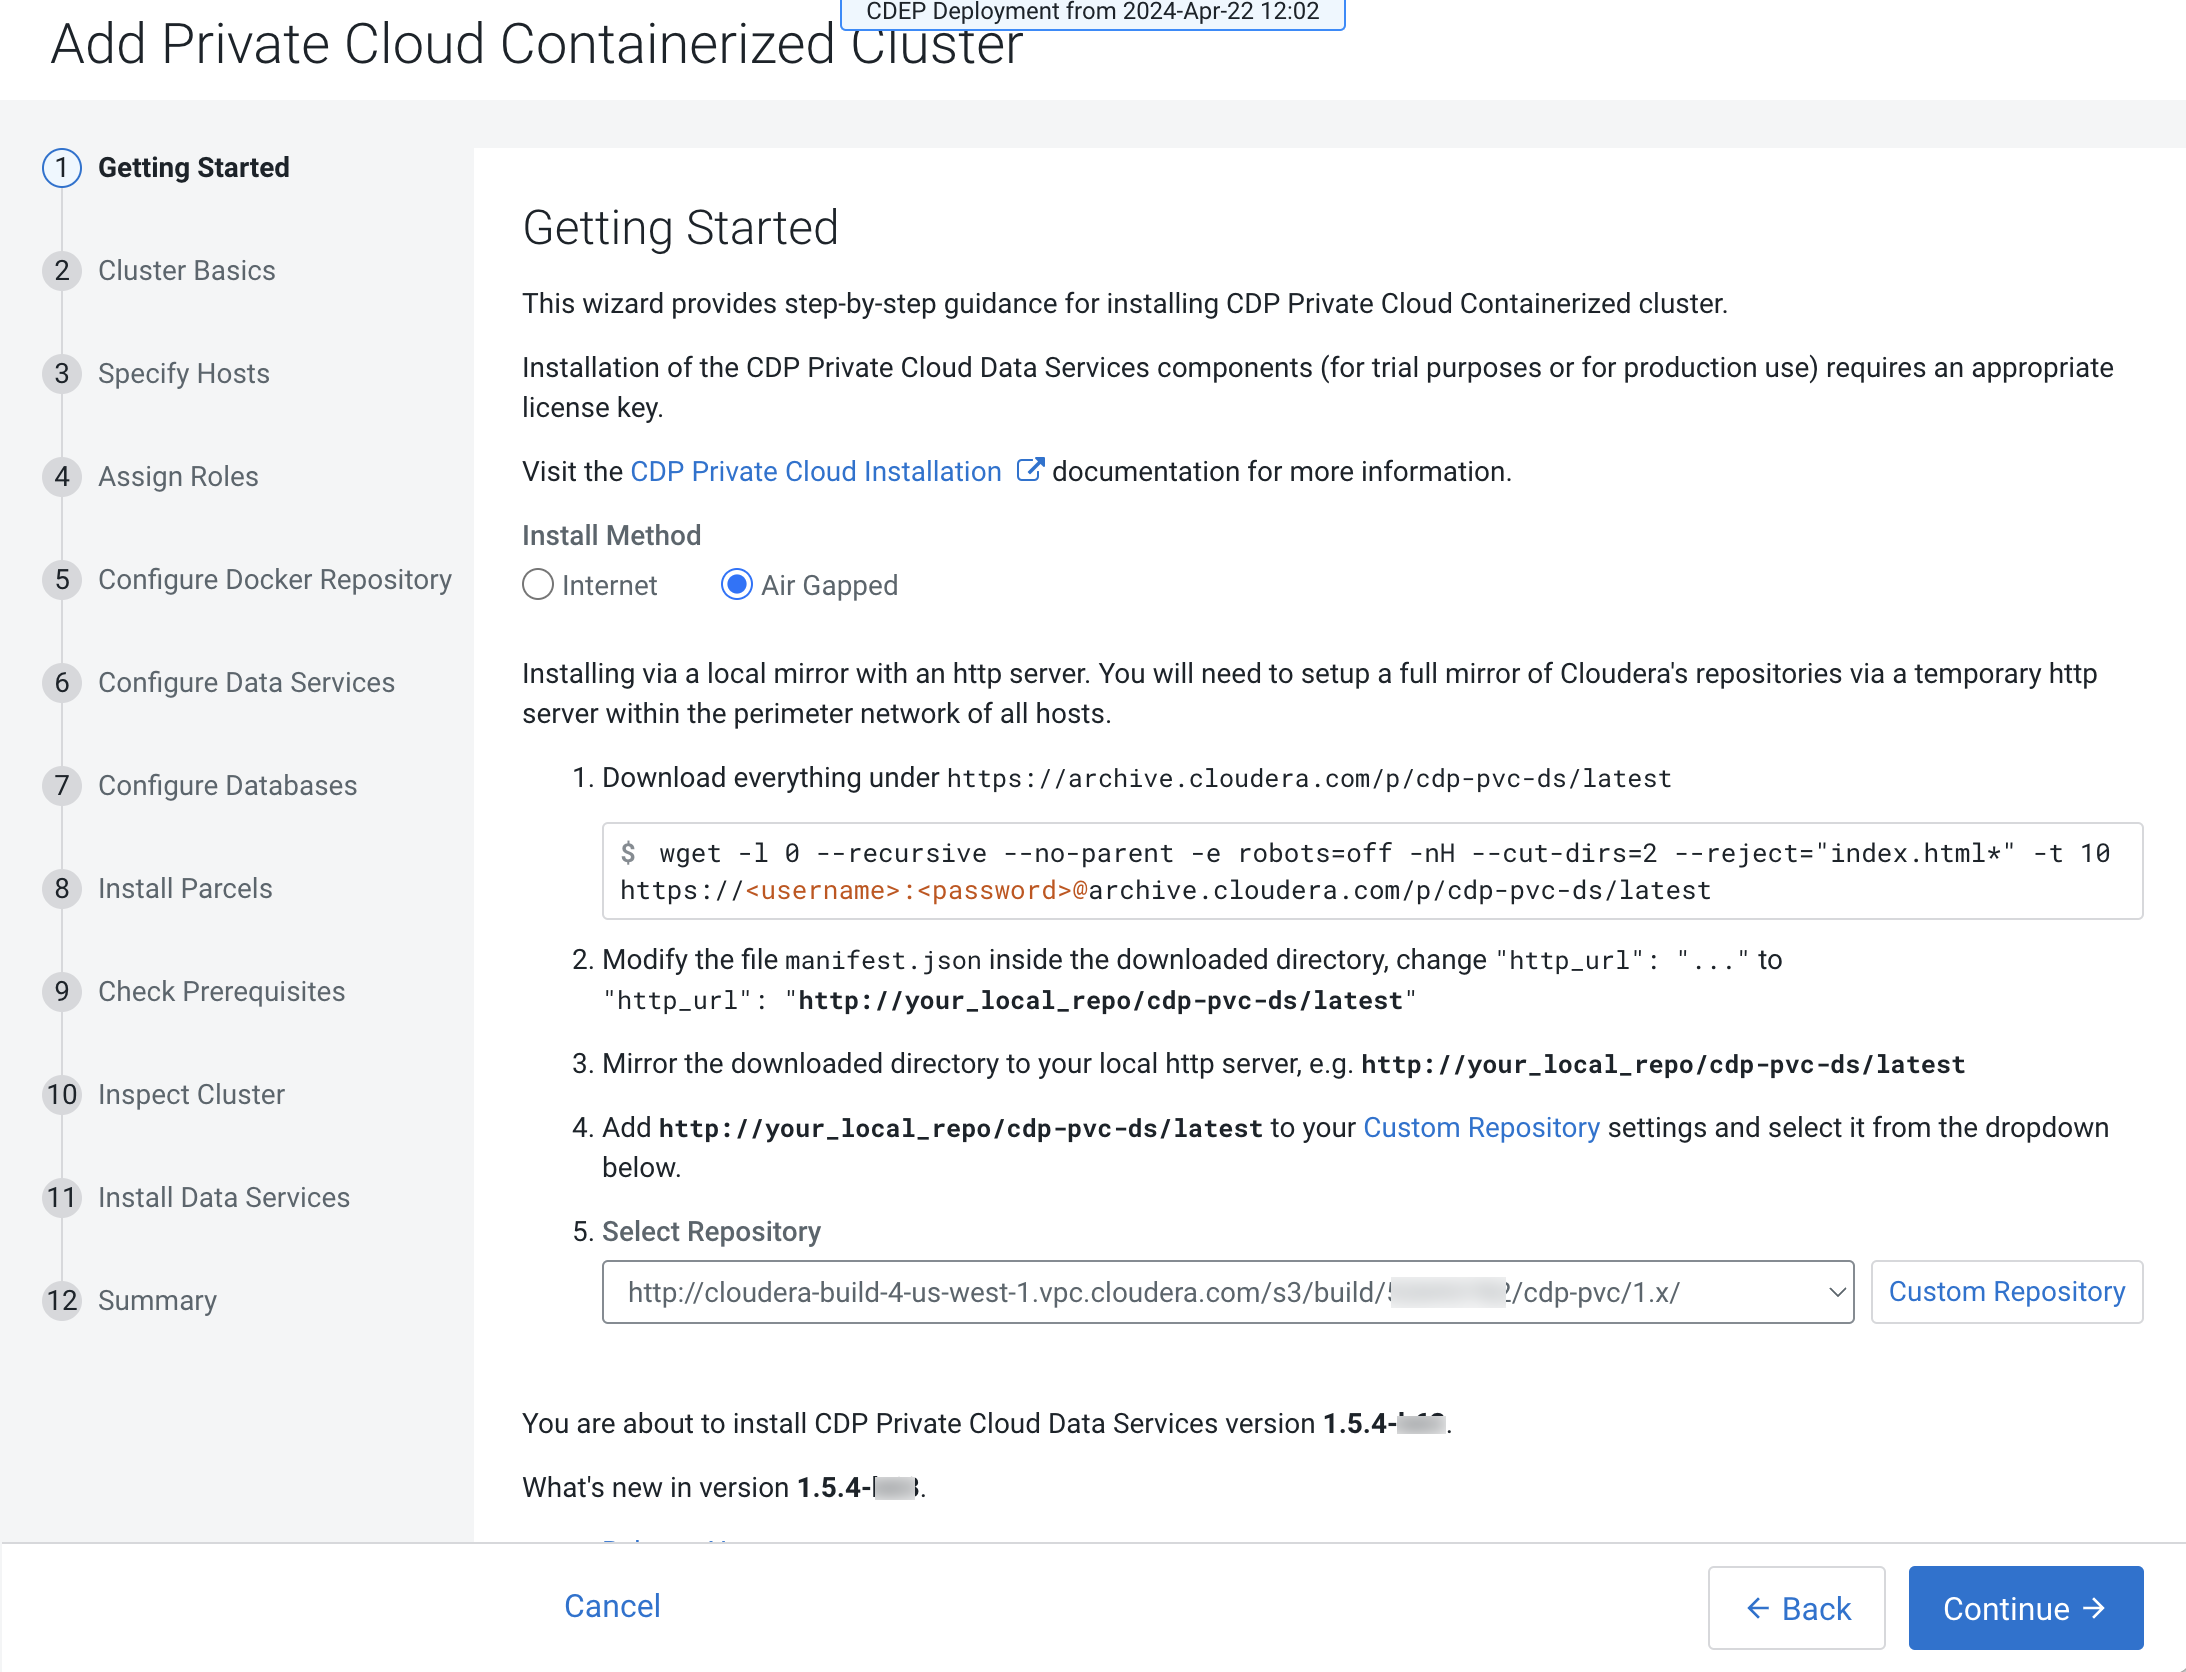
Click Continue.
- Select the Internet installation method.
-
On the Cluster Basics page, type a name in the
Cluster Name field for the Cloudera on premises cluster that you want to
create. From the Base Cluster drop-down list, select the
cluster that has the storage and SDX services that you want this new Cloudera Data Services on premises instance to connect with.
Click Continue.
Figure 6. Cluster Basics page 
-
The Specify Hosts page
displays
hosts that are already added to Cloudera Manager.
You can select one or more of these hosts to add to the Cloudera Embedded Container Service cluster.
Figure 7. Specify Hosts page 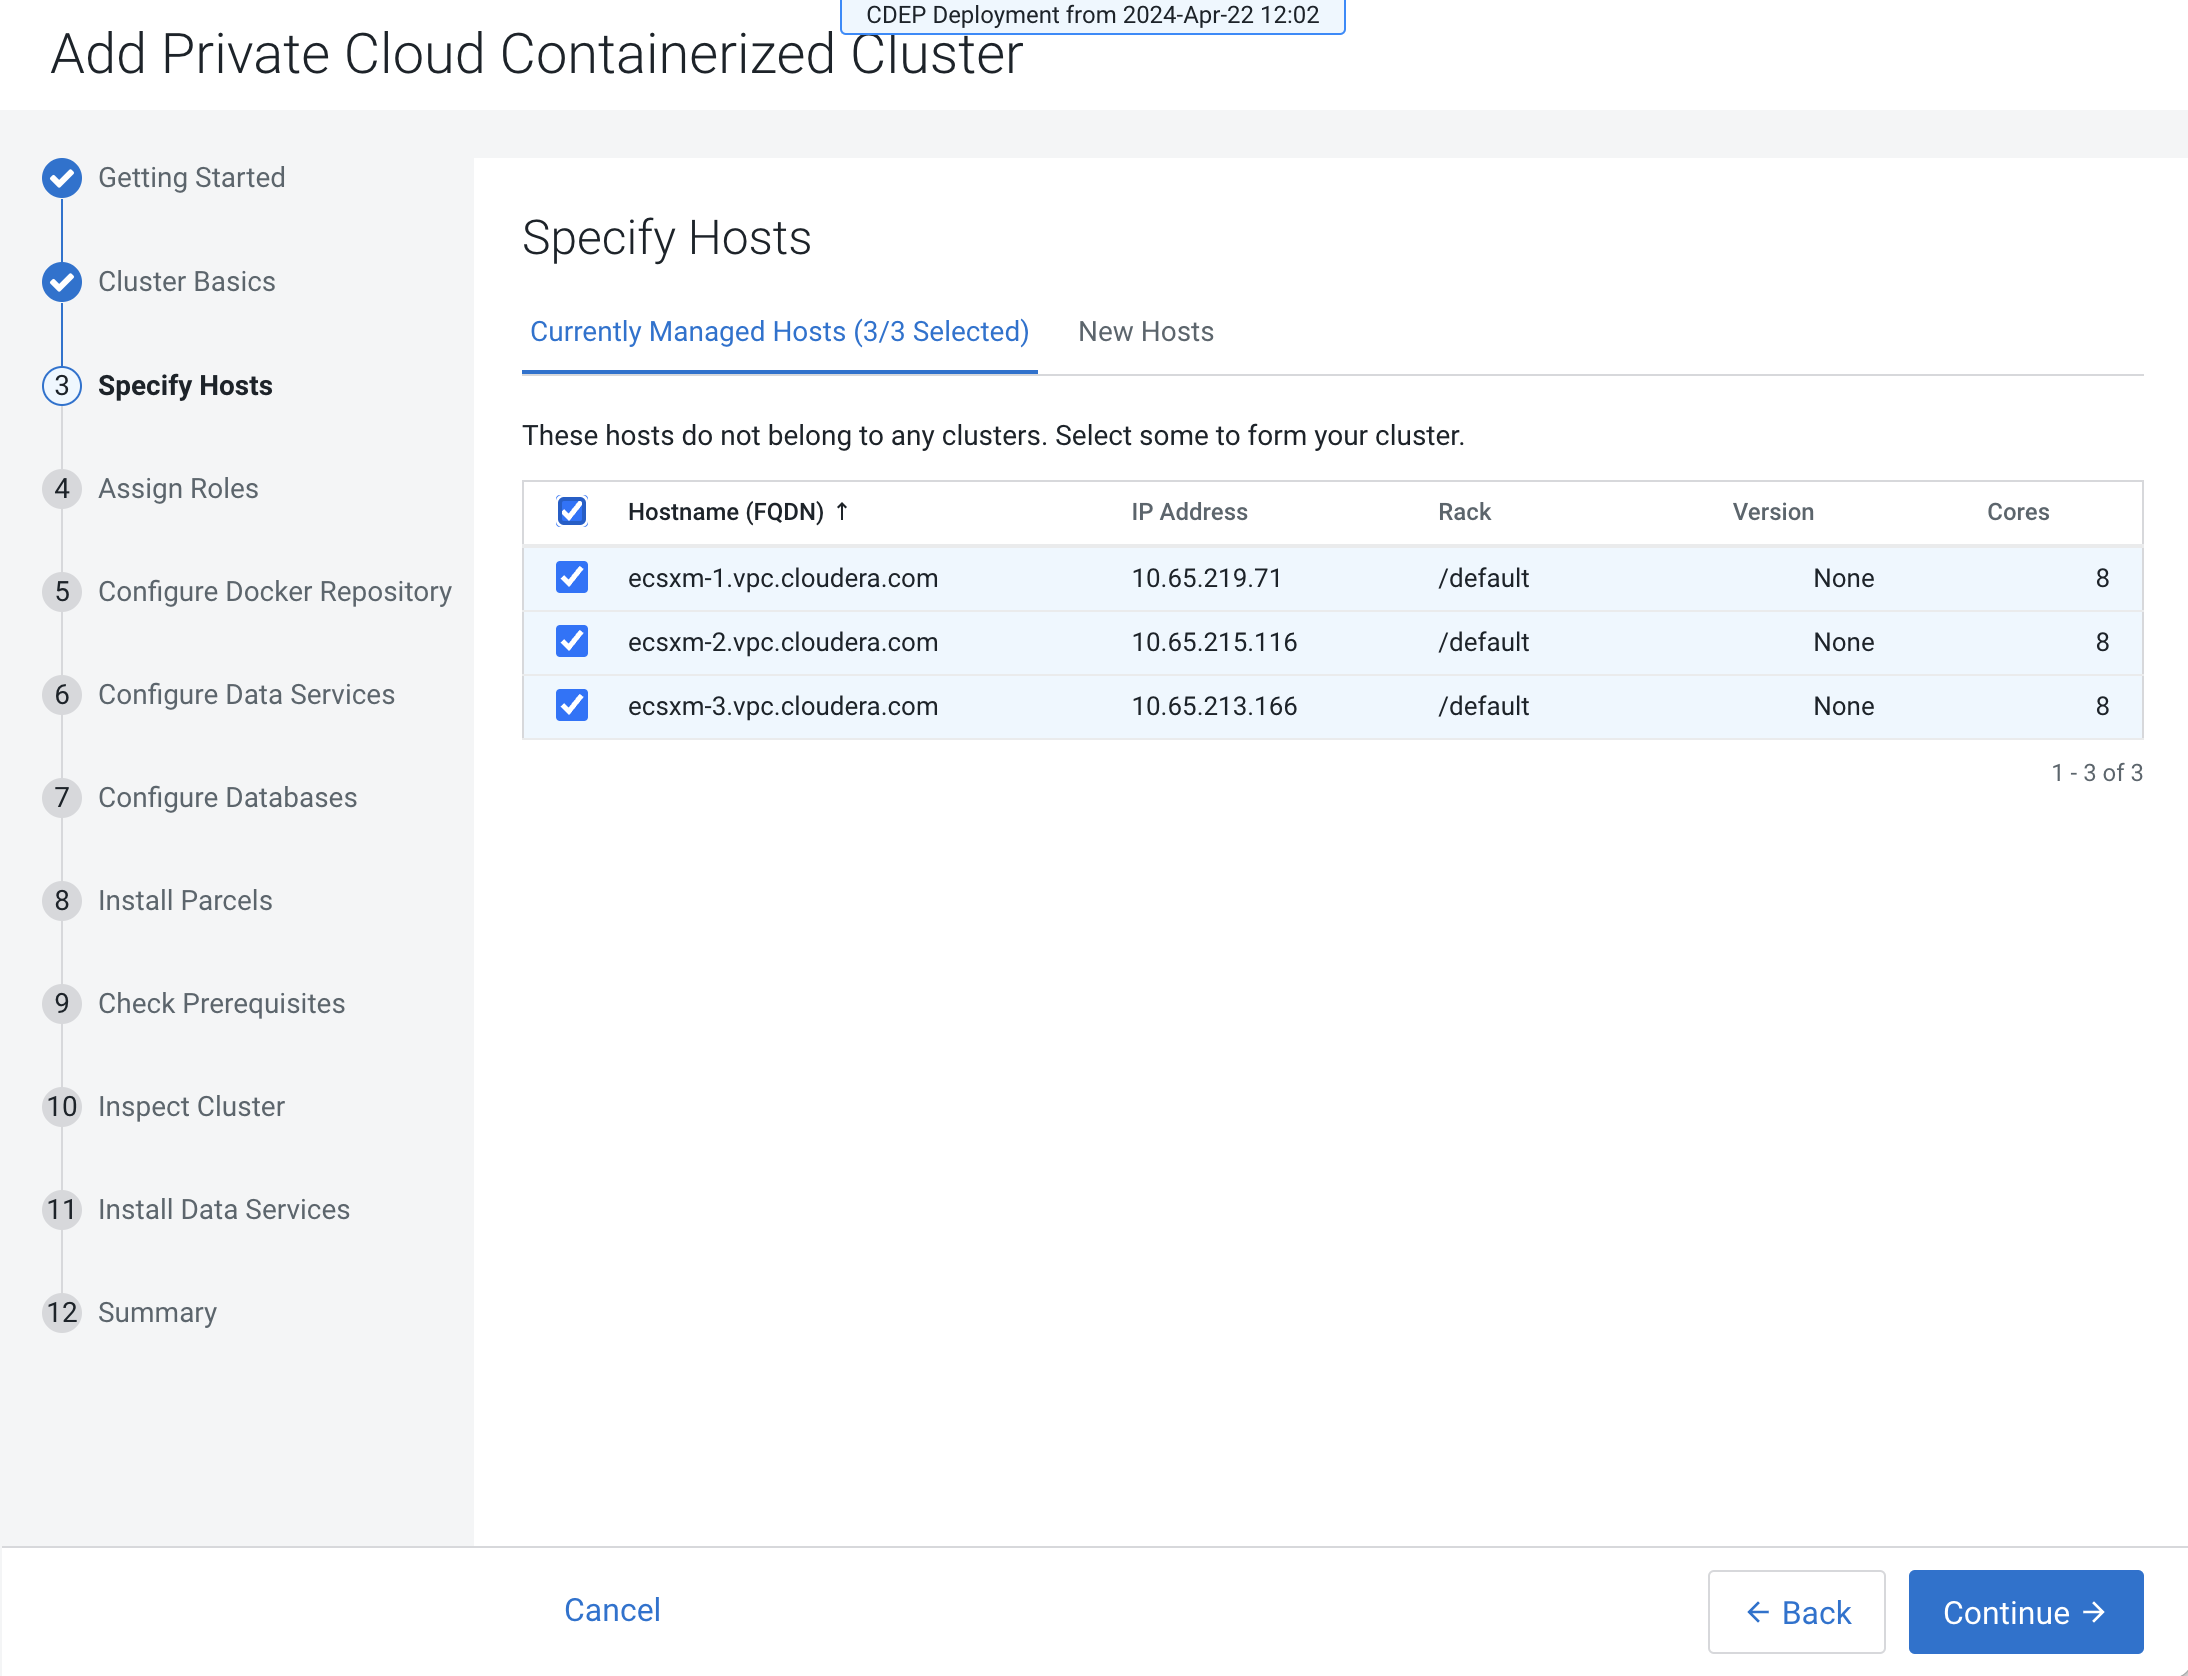
On the New Hosts tab you can specify one or more new hosts to add to Cloudera Manager. Enter a Fully Qualified Domain Name in the Hostname field, then click Search.
After you finish specifying the Cloudera Embedded Container Service hosts, click Continue.
-
On the Select JDK page, select one of the following
options:
-
Install a system-provided version of
OpenJDK
Figure 8. Select JDK page 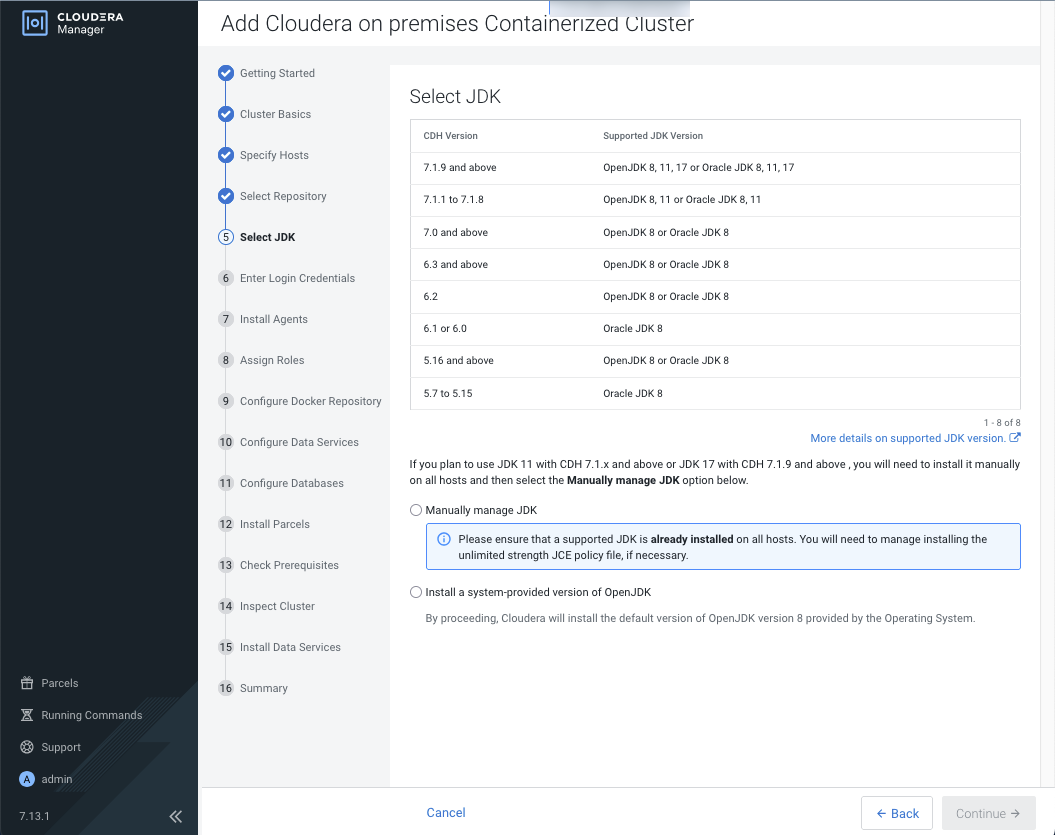
-
Install a system-provided version of
OpenJDK
-
On the Enter Login Credentials page, All
hosts accept the same password as authentication method is
selected by default. Enter the
username
in the SSH Username field, and the password in the
Password and Confirm Password
fields. You can also select the All hosts accept the same private
key option as authentication method and provide the Private Key
and passphrase.
Figure 9. Enter Login Credentials page with the All hosts accept the same password option selected 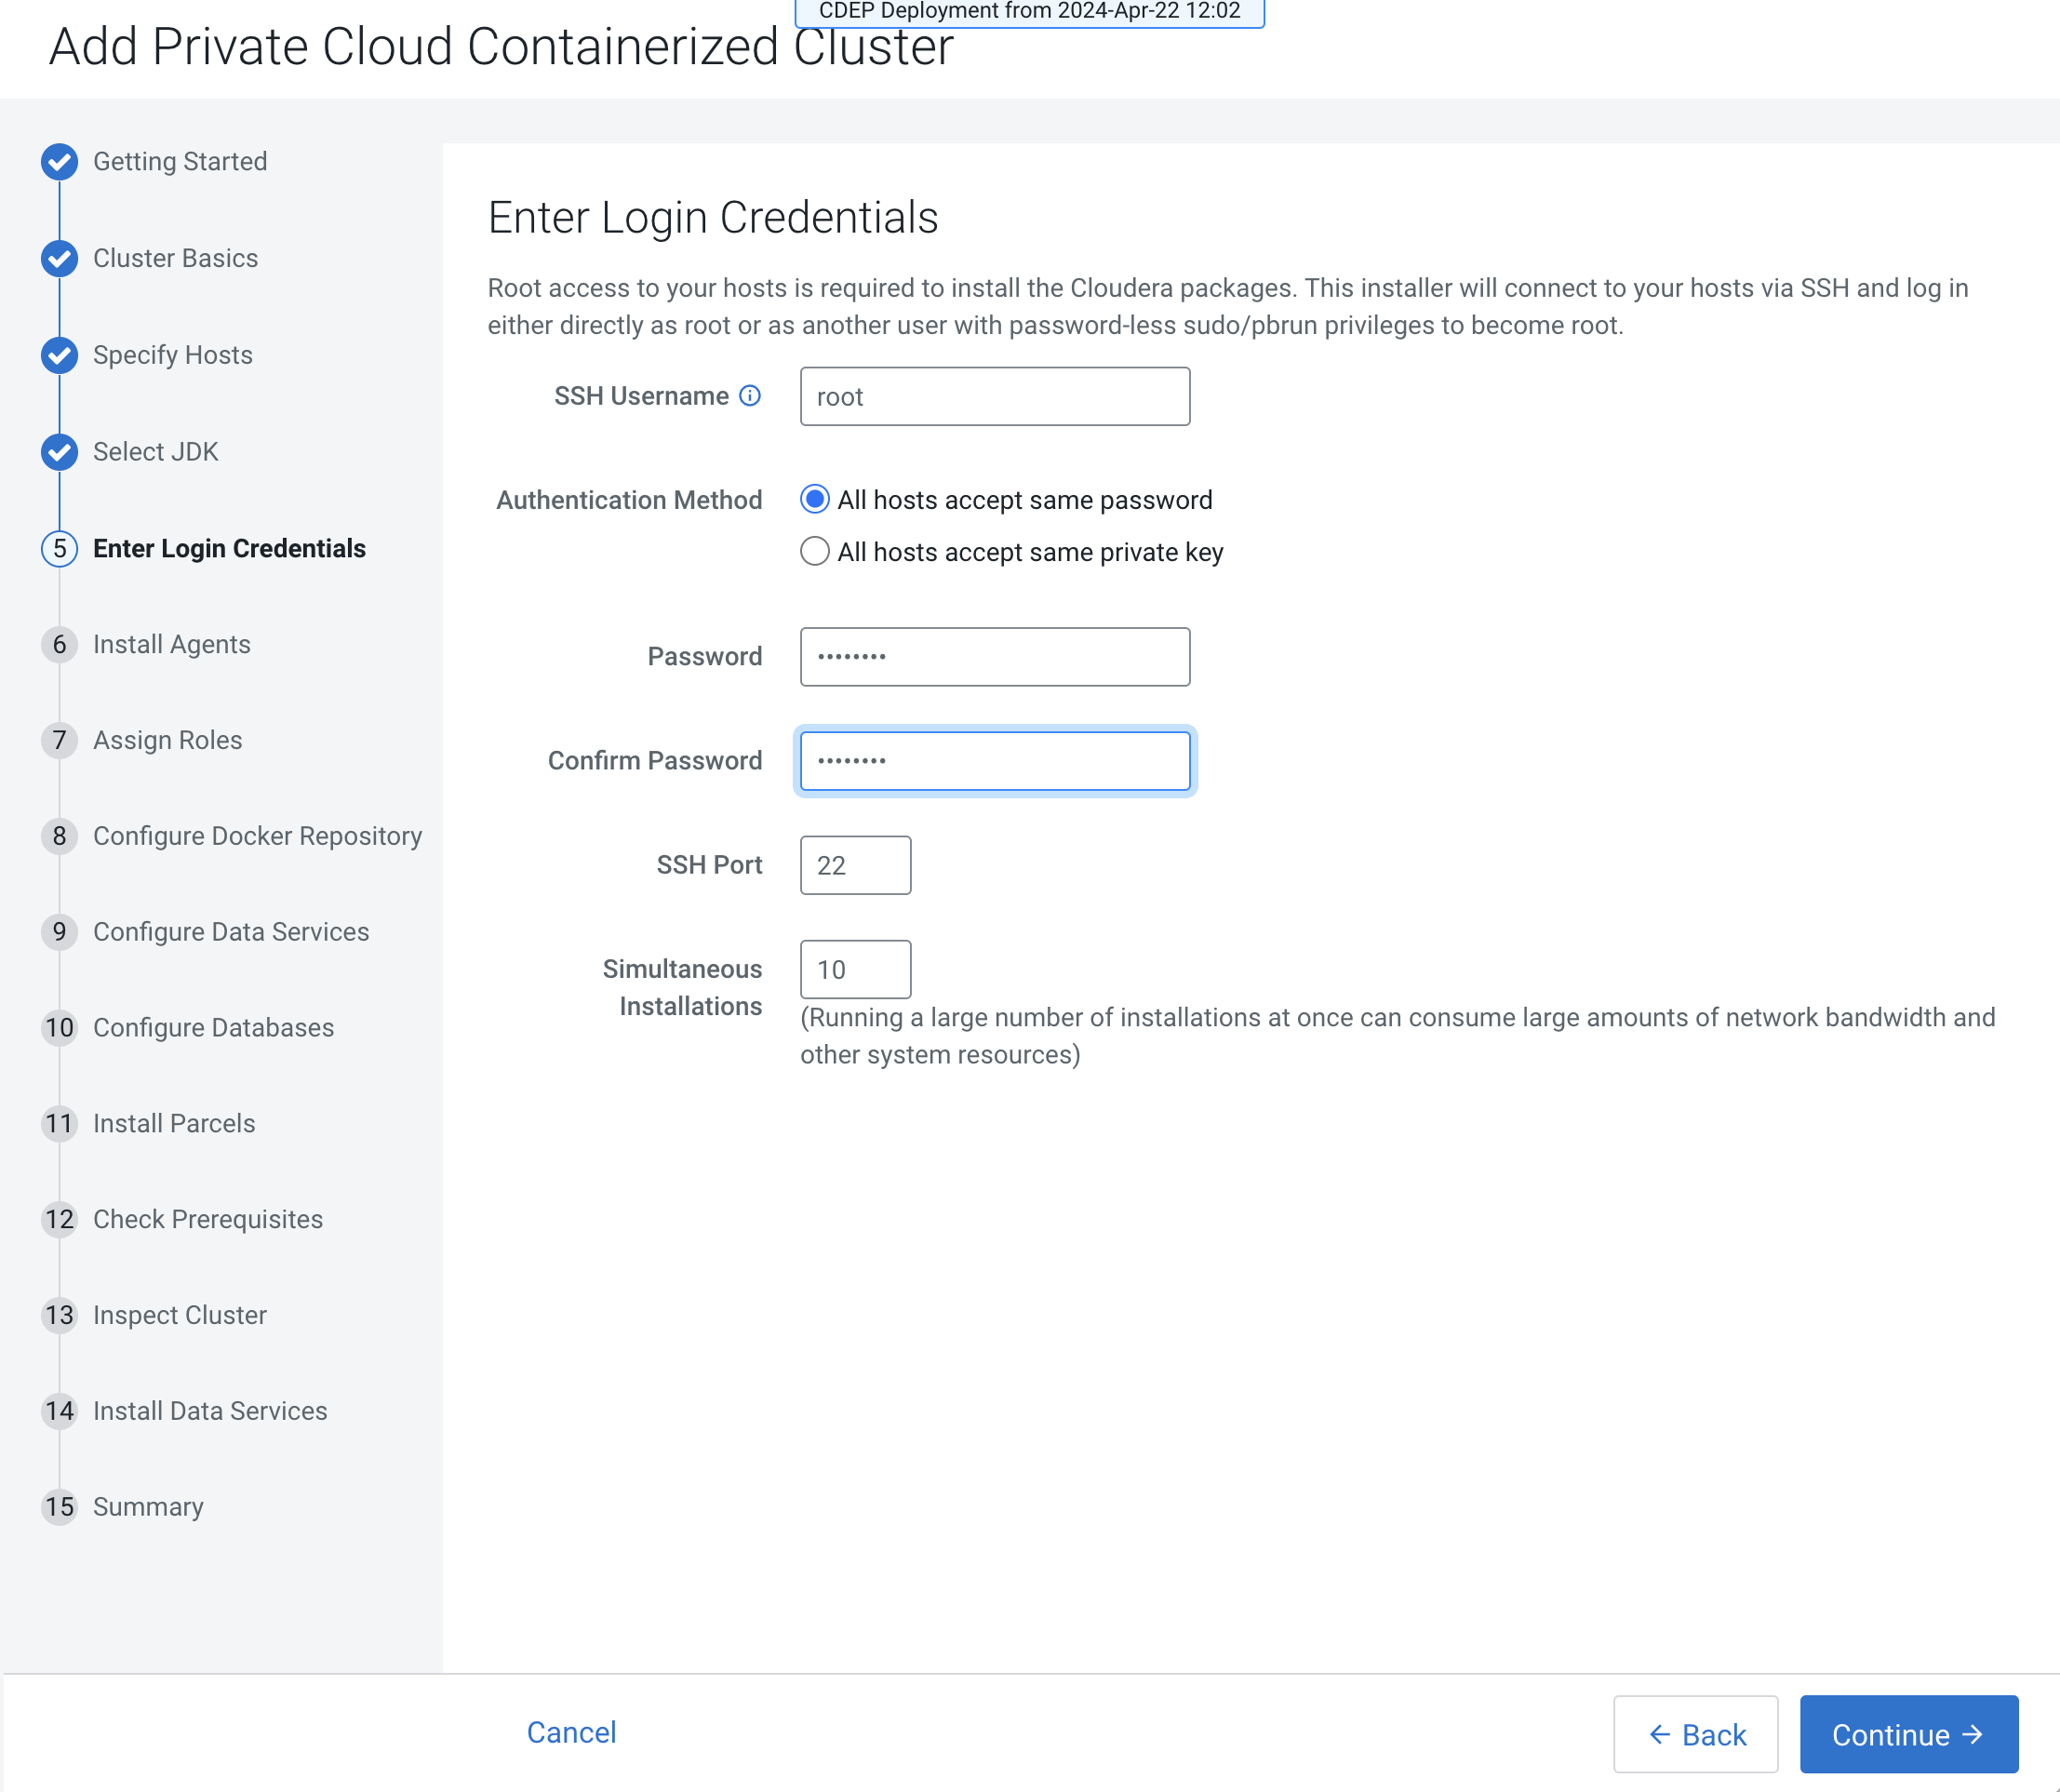
-
The Install Agents page displays a progress indicator as
the agent packages are installed. When the installation completes, click
Continue.
Figure 10. Install Agents progress window 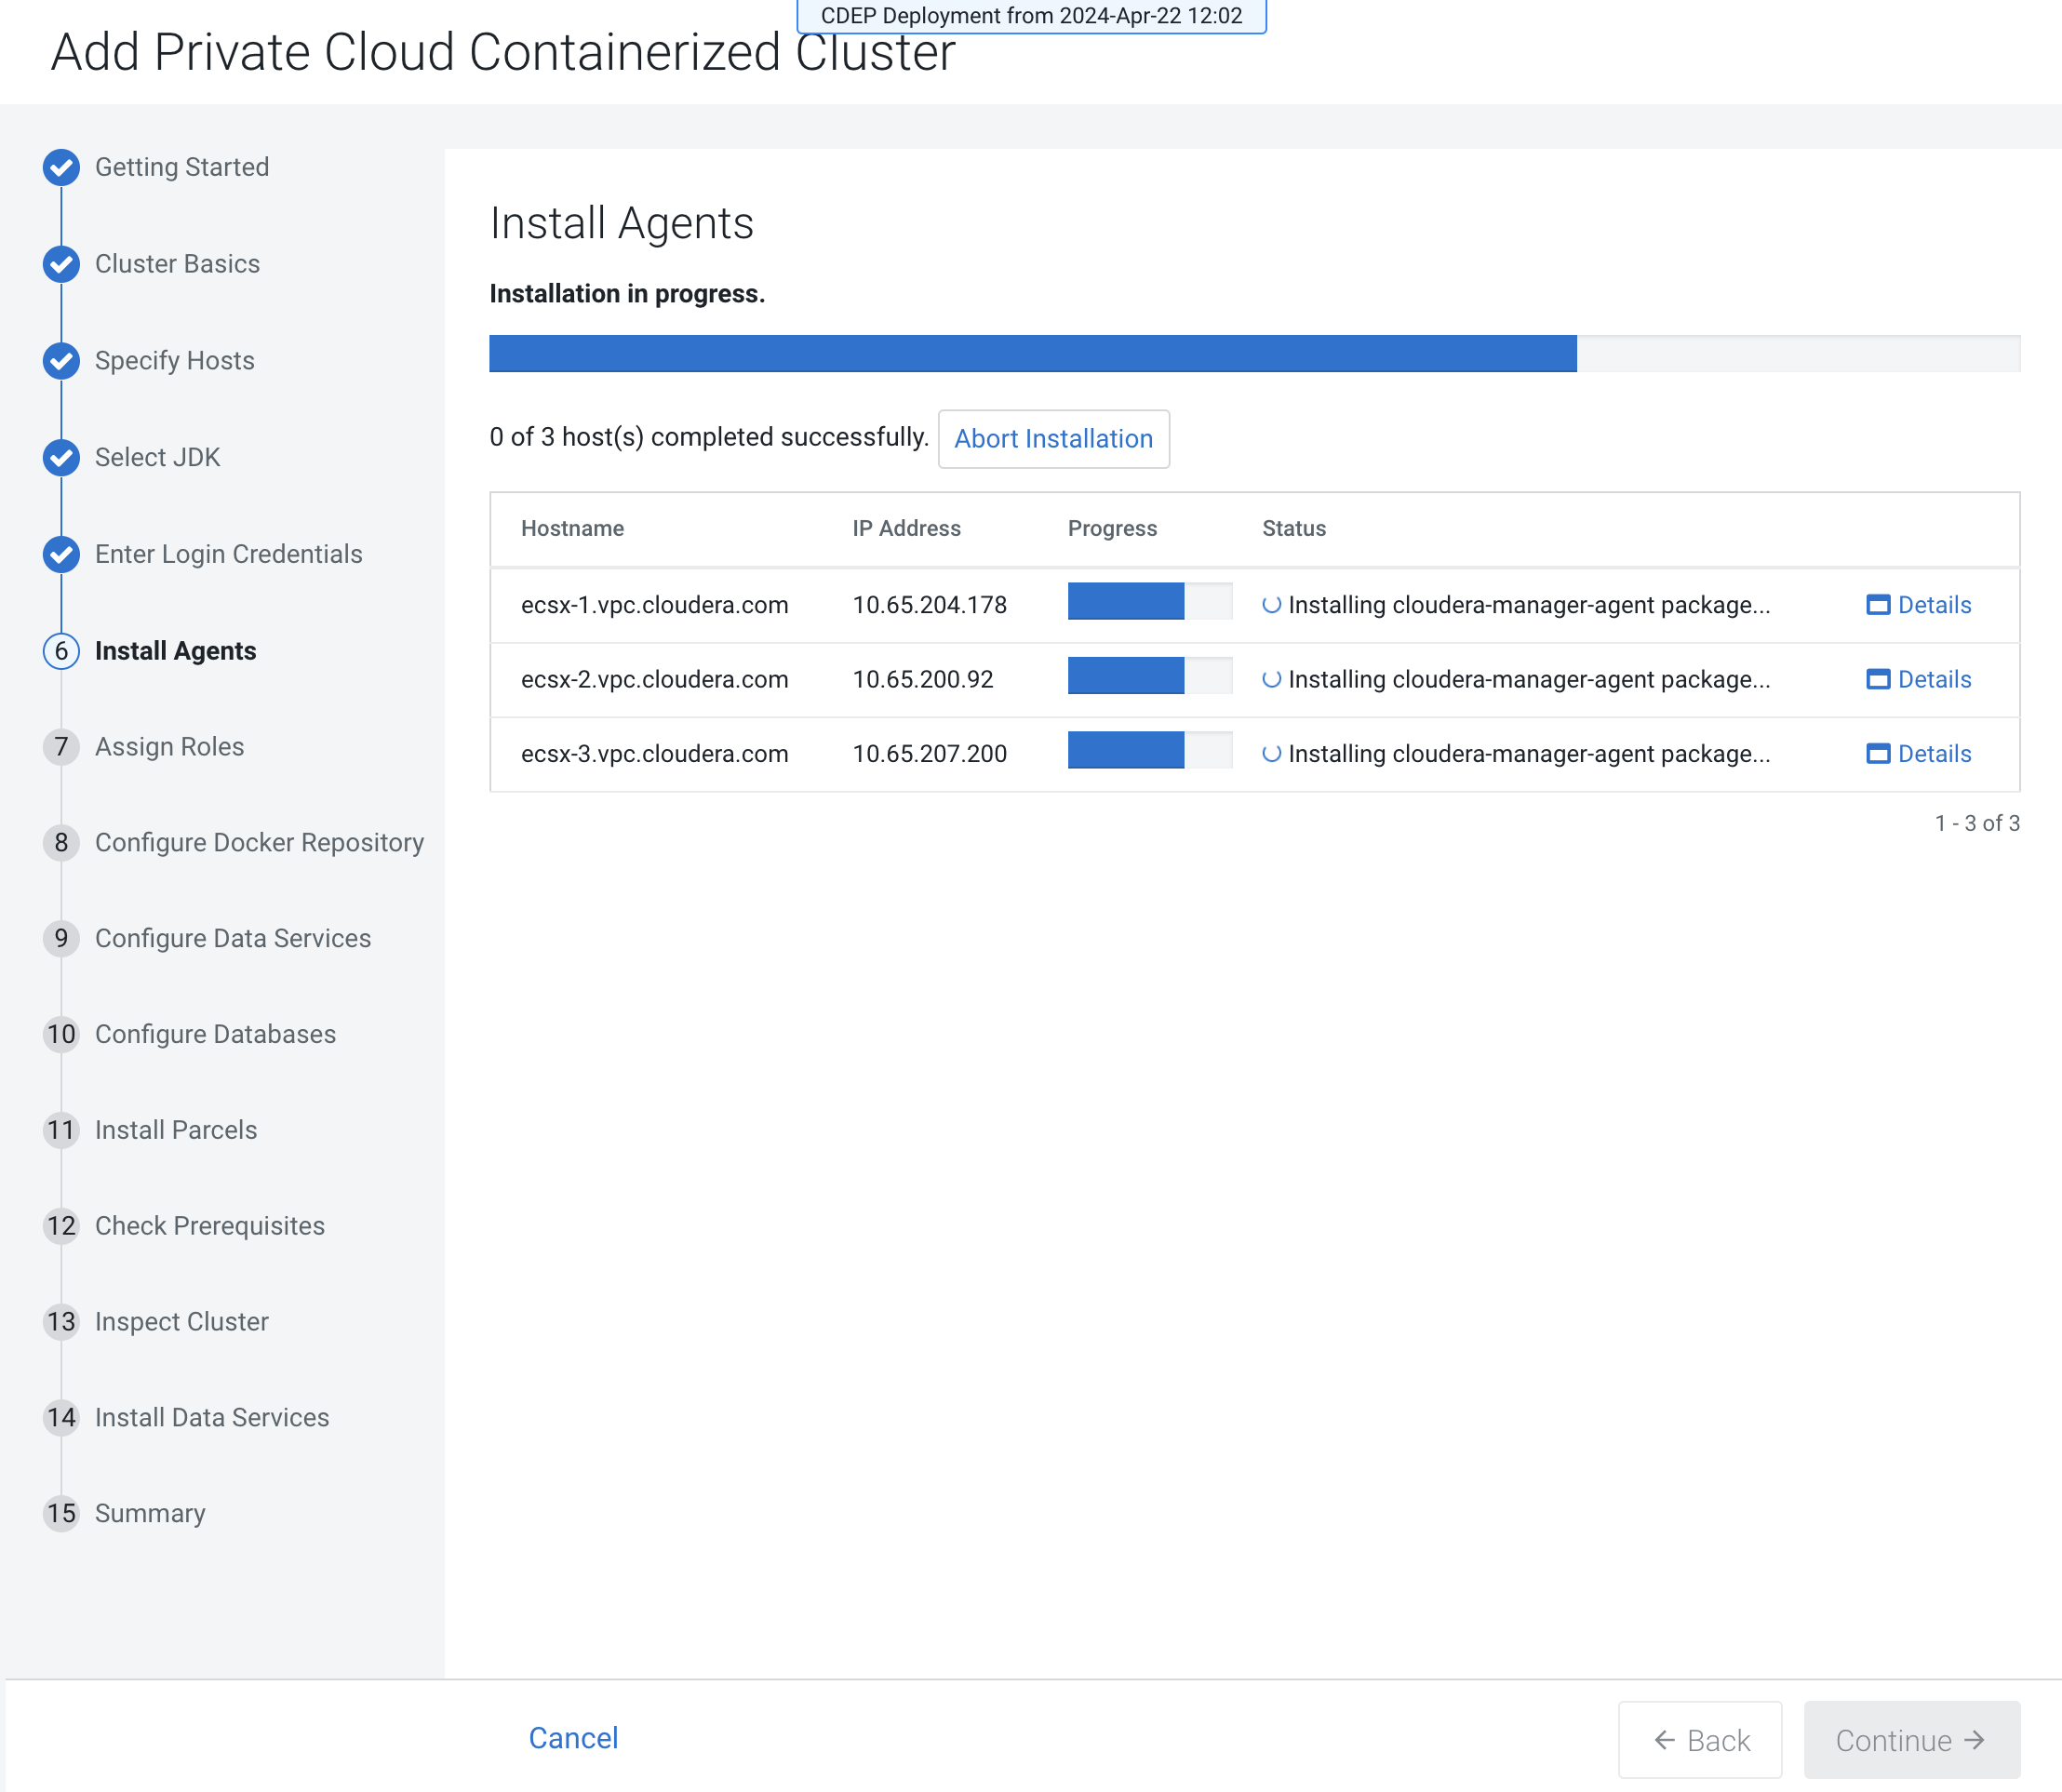
-
On the Assign Roles page, customize the role assignments
for your new Cloudera on premises containerized
cluster then click Continue.
Figure 11. Assign Roles page 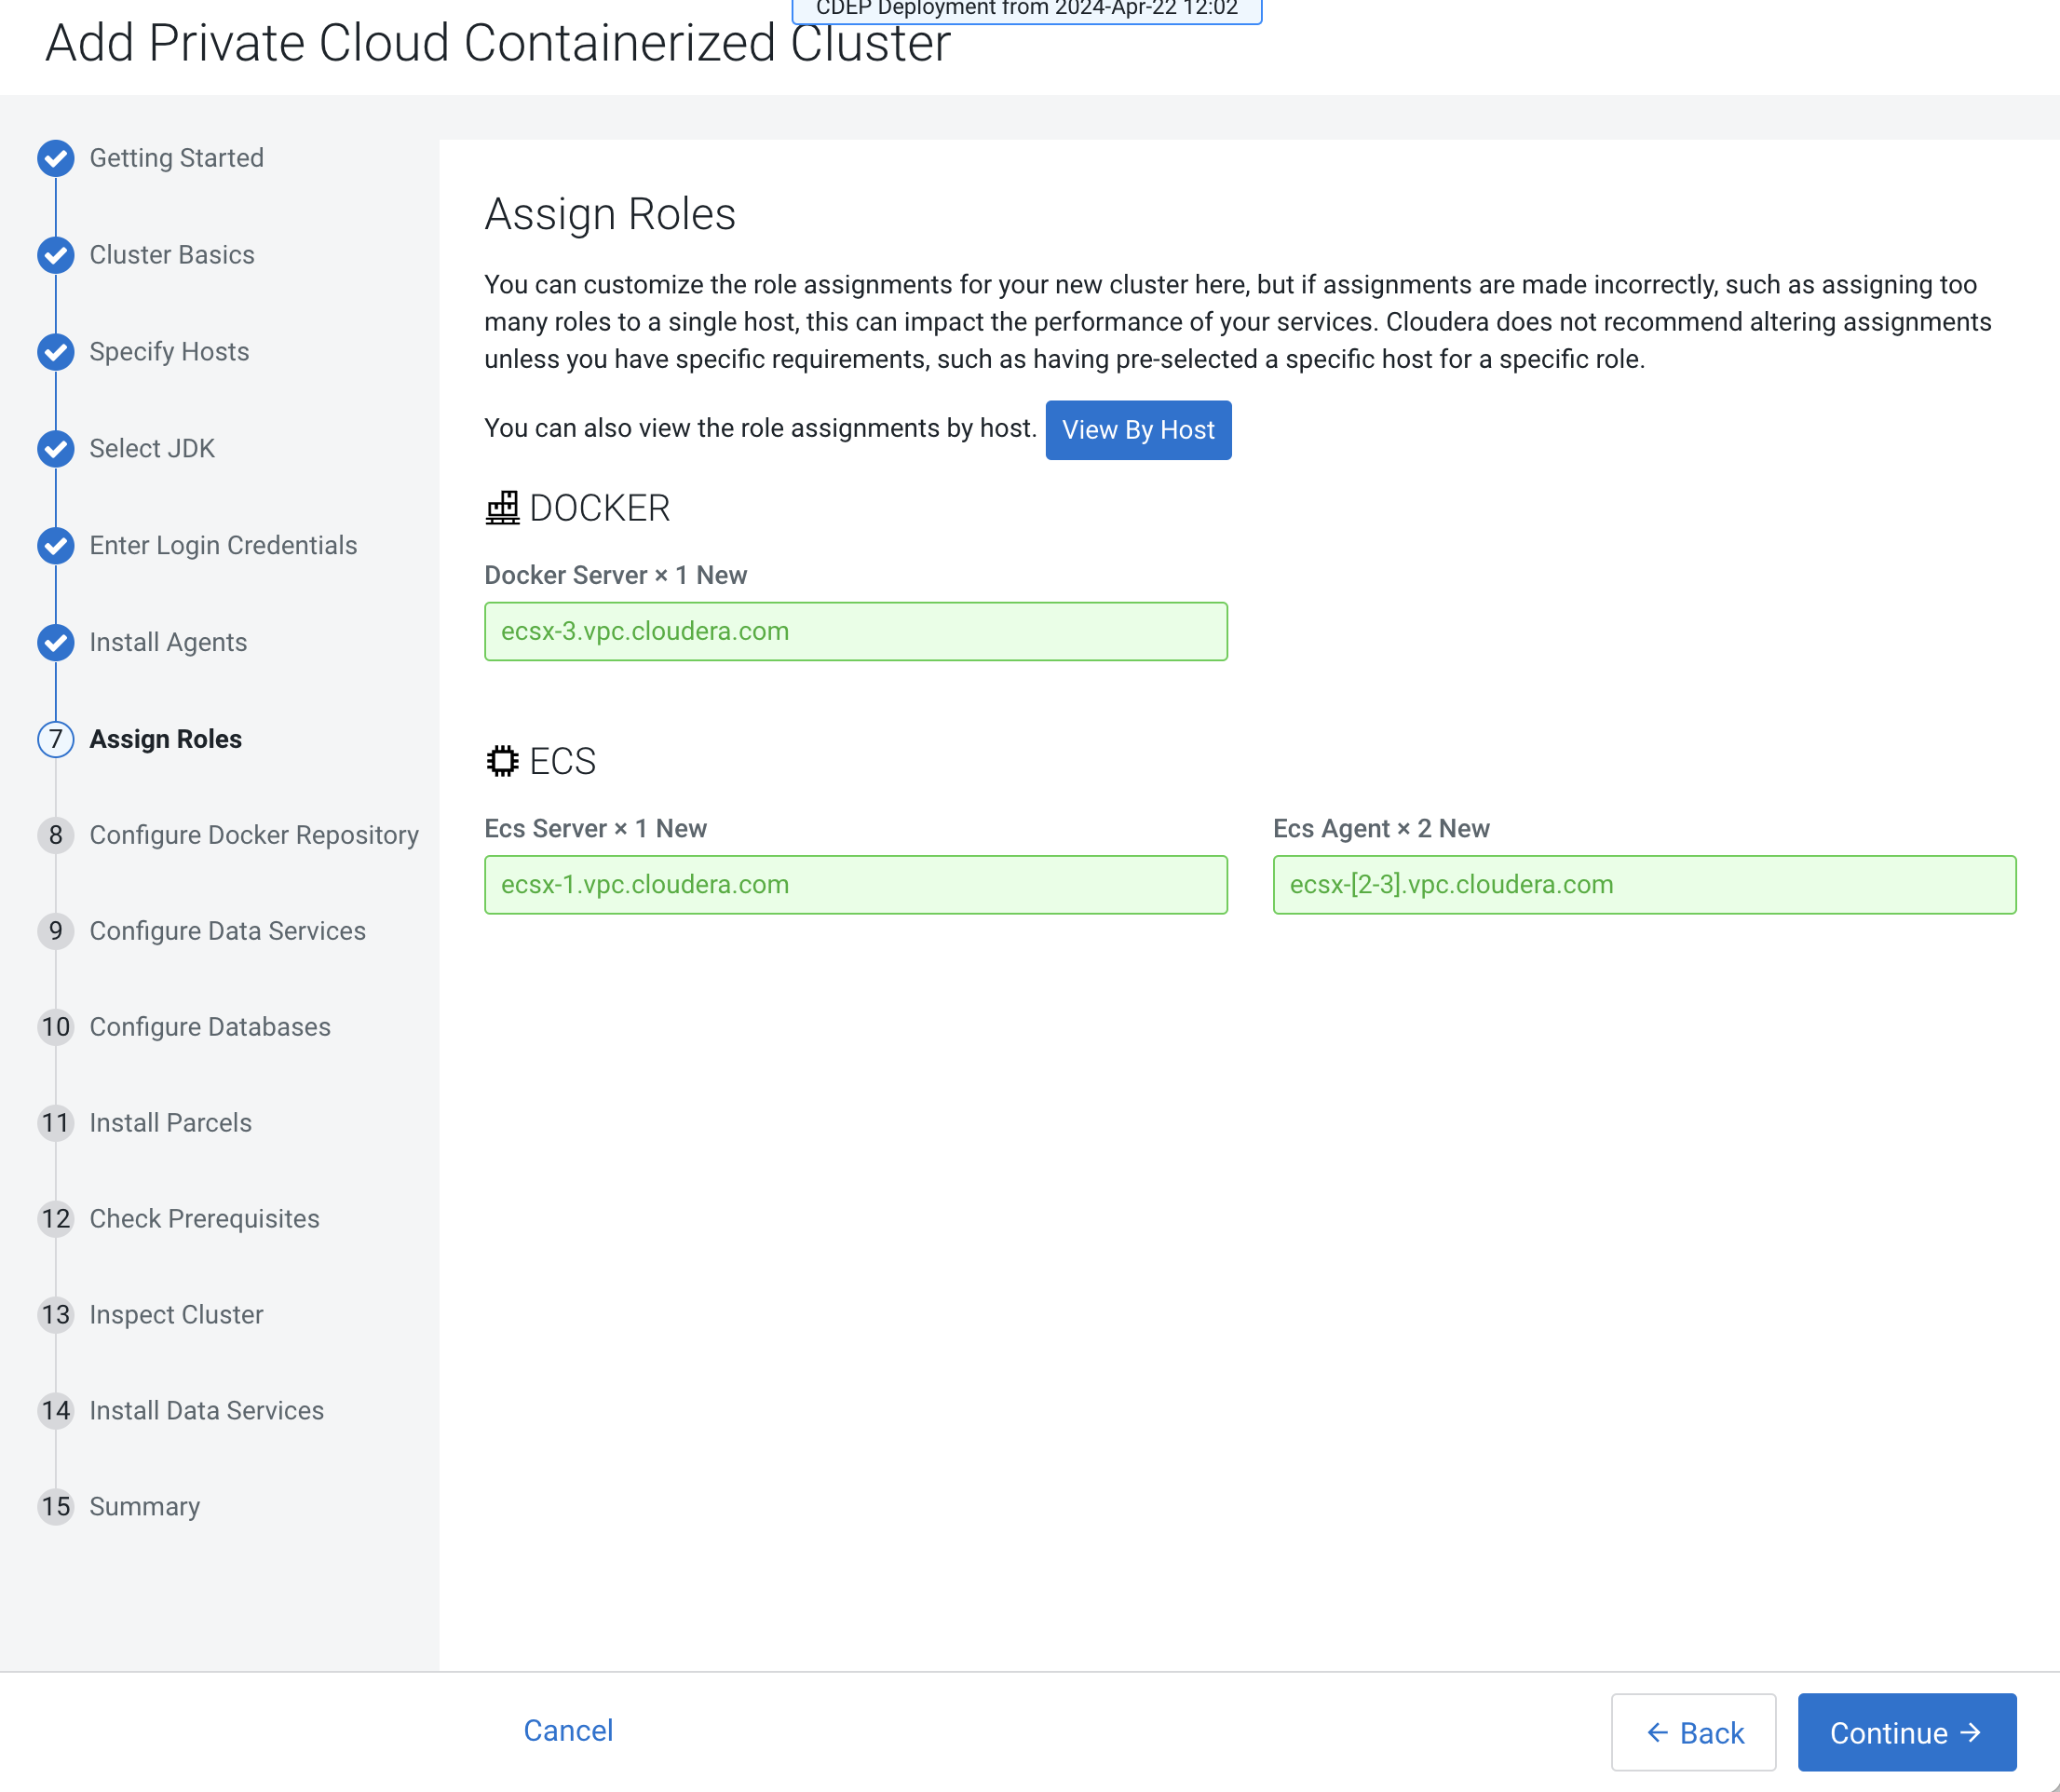
Single node Cloudera Embedded Container Service installation is supported, but is only intended to enable CDSW to Cloudera AI migration. If you are installing Cloudera Embedded Container Service on a single node, only the Docker and Cloudera Embedded Container Service Server roles are assigned. The Cloudera Embedded Container Service Agent role is not required for single node installation.
-
Configure a Docker Repository.
On the Configure Docker Repository page, select one of the following options:
- Use an embedded Docker Repository
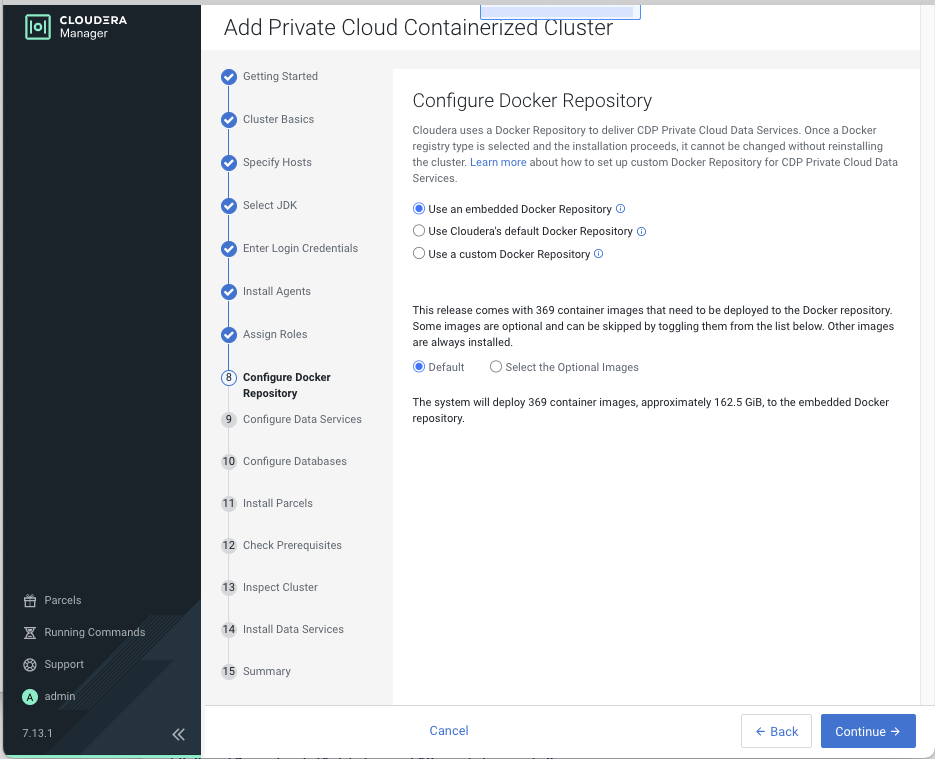
If you select the Internet Install Method option on the Getting Started page, images are copied over the internet from the Cloudera repository.
If you select the Air Gapped option, images are copied from a local http mirror you have set up in your environment.
Select Default to deploy all of the default Docker images to the repository, or select Select the Optional Images to choose which images to deploy. If you will be deploying , toggle the switch on to copy the images for .
Use a custom Docker Repository
You must enter the following options:Click the Generate the copy-docker script button to generate and download a script that copies the Docker images from Cloudera, or, for air-gapped installation, from a local http mirror in your network.- Custom Docker Repository – Enter the URL for your Docker Repository
- Docker Username – Enter the username for the Docker Repository.
- Docker Password – Enter the password for the Docker Repository.
- Docker Certificate – Click the Choose File button to upload a TLS certificate to secure communications with the Docker Repository.
Run the script from a machine that is running Docker locally and has access to the Docker images using the following commands:docker login [***URL for Docker Repository***] -u [***username of user with write access***] bash copy-docker.txtThe copying operation might take 4-5 hours.
Several options exist for configuring a Docker Repository. For more information about these options, see Docker repository access.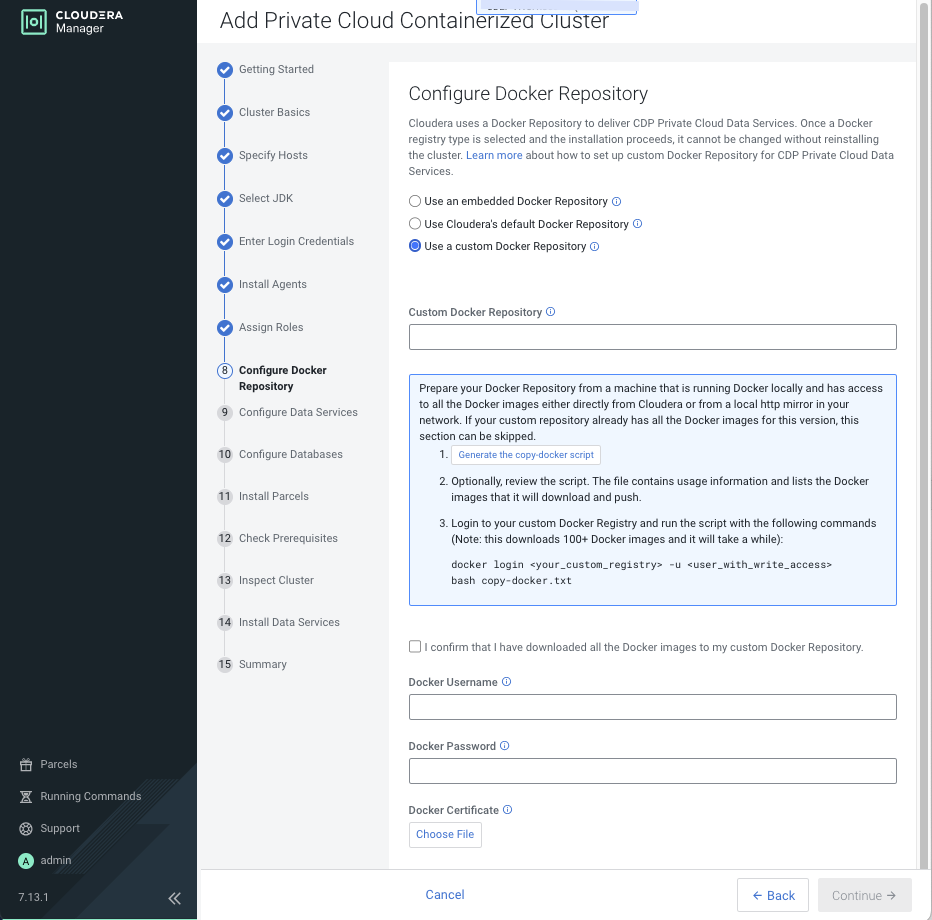
The following tables show the ports that must be opened and allowed regardless of which Docker repository option you choose. For more information on the ports, see RKE2 Documentation.
- Ports required for / agent (port 5000 is required for ):
Protocol Port TCP 7180-7192 TCP 19001 TCP 5000 TCP 9000 - Inbound rules for Server nodes
(Kubernetes/RKE2):
Protocol Port TCP 9345 TCP 6443 UDP 8472 TCP 9099 UDP 51820 UDP 51821 TCP 10250 TCP 2379 TCP 2380 TCP 2381 TCP 30000-32767 - Inbound Rules for the Agent
(Kubernetes/RKE2):
Protocol Port UDP 4789 TCP 179
- Cloudera default Docker Repository This option requires
that cluster hosts have access to the internet and you have selected Internet as
the install method.
This option requires that you set up a Docker Repository in your environment and that all cluster hosts have connectivity to the repository.
- Use an embedded Docker Repository
-
On the Configure Data Services page, modify
configuration settings such as the data storage directory, or number of
replicas. If multiple disks are mounted on each host with different
characteristics (HDD and SSD), then Local Path Storage Directory must point to
the path belonging to the optimal storage.
Figure 12. Configure Data Services page 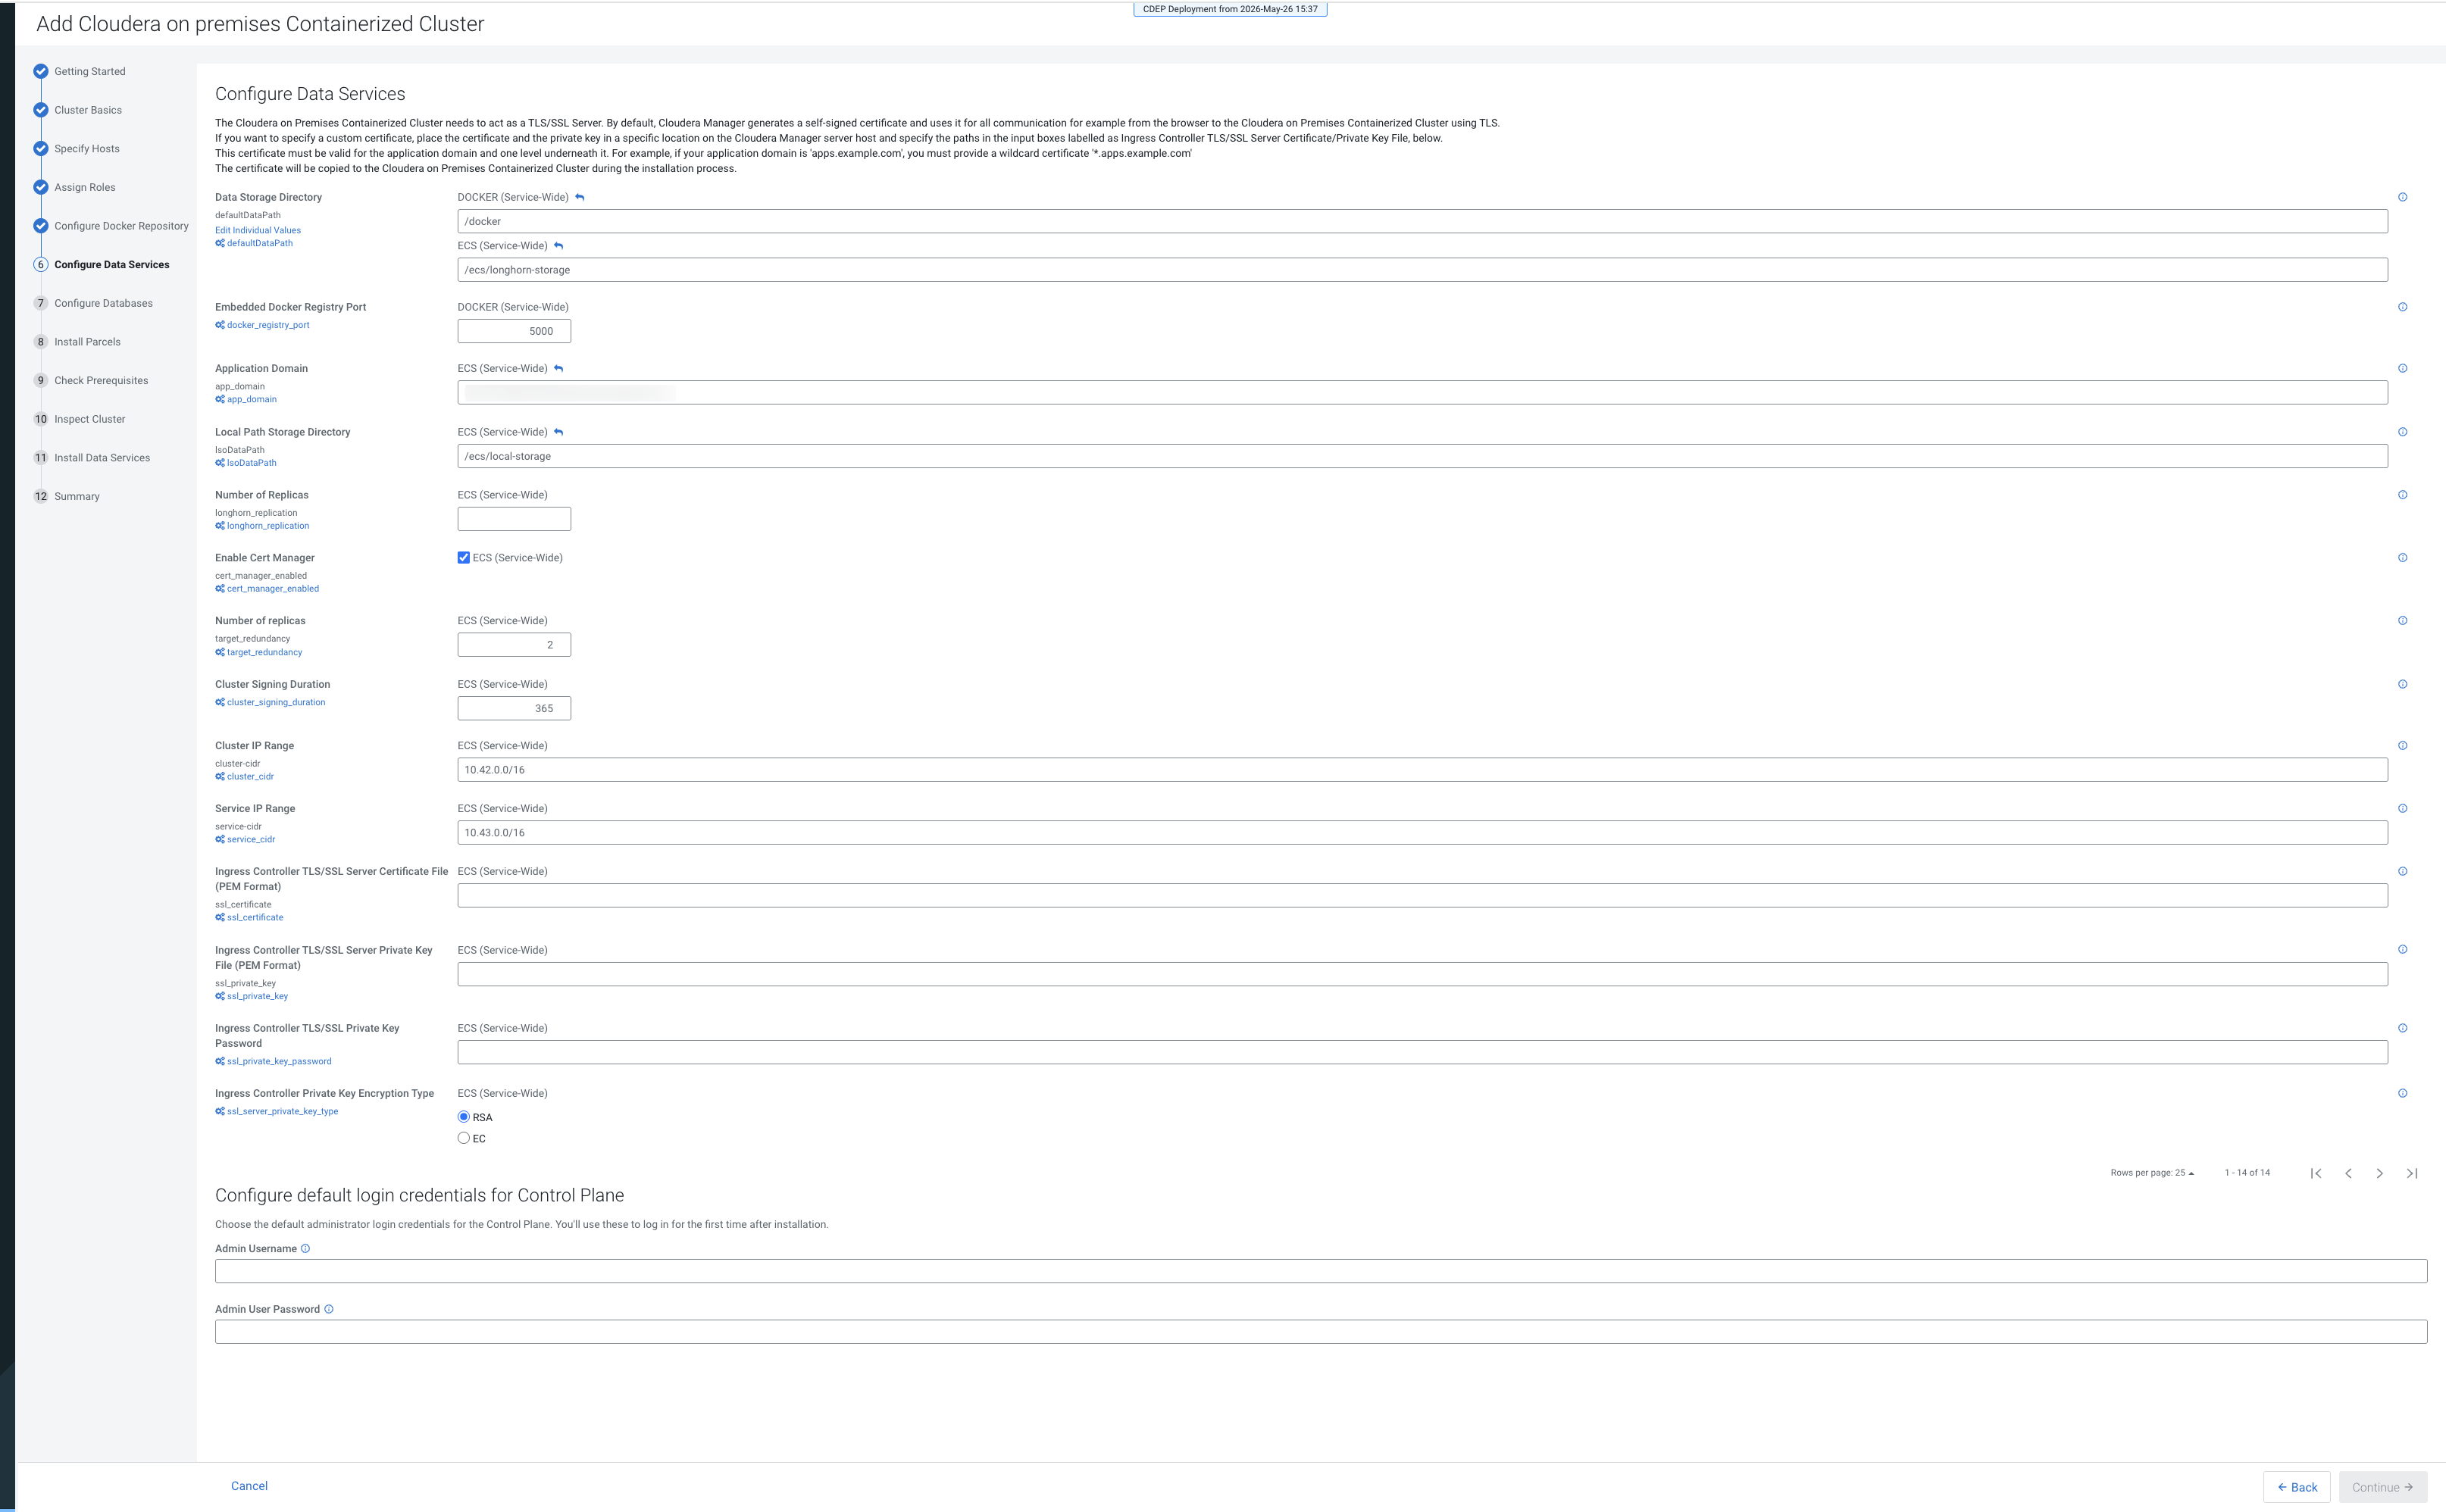
-
On the Configure Databases page, click
Continue.
Figure 13. Configure Databases page 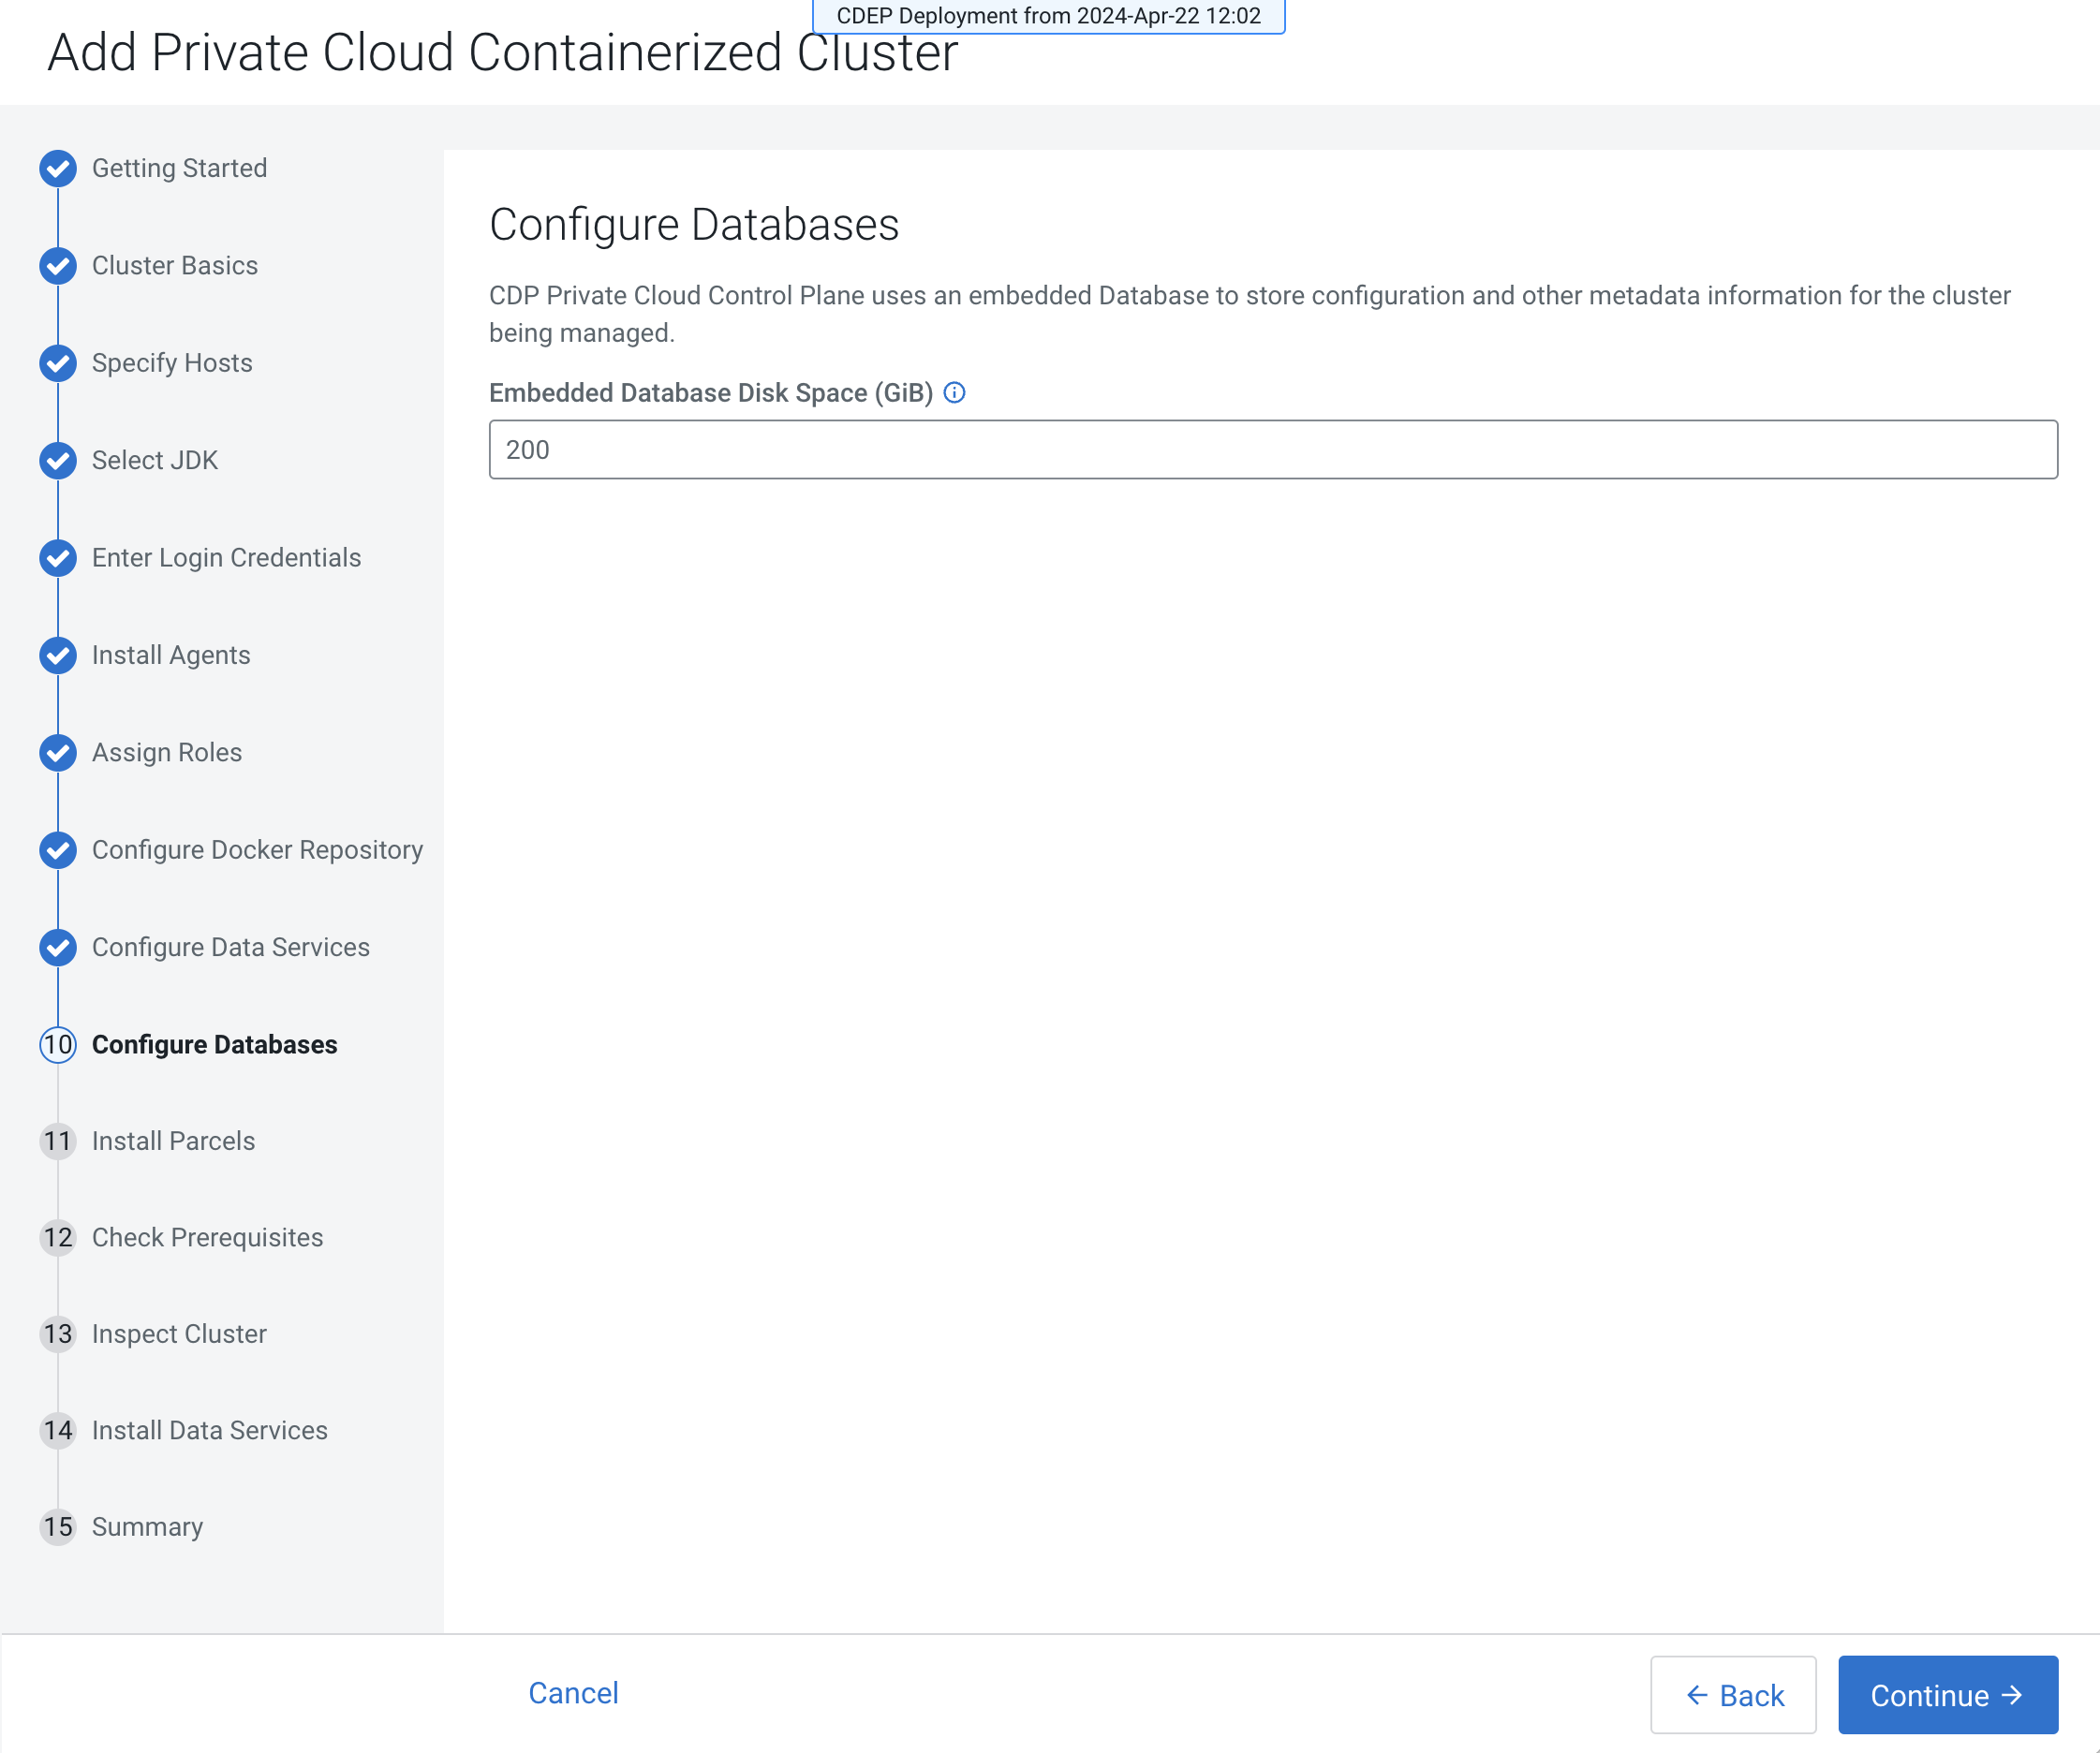
-
If the hosts do not meet the prerequisites, the Check
Prerequisites page displays the applicable issues. You cannot
continue installation with failures. Correct the issues, then click
Run Again. After all of the issues are resolved,
click Continue.
Table 1. Host prerequisite inspection reference Inspection name Description StorageInspectionChecks for a minimum of 300 GiB space in the /var/liband 350 GiB space in thedockerdata directories respectively. Checks if the/var/lib/longhorndirectory or its parent directories are symlinked. If they are, this inspection fails.CPUInspectionChecks to ensure that the hosts have 16 virtual cores. PortsInspectionChecks for the availability of ports 443 and 80. ecsLonghornDedicatedDiskChecks if the Longhorn storage directory is on a dedicated disk and not the root filesystem. EcsHostDnsInspectionChecks to ensure that less than 3 nameserver entries are in the /etc/resolv.conffile, and checks the connections to the Cloudera Manager cluster and the Cloudera Data Platform console. It also checks to see if thevault.localhost.localdomainping can be resolved. If not, the host/etc/nsswitch.conffile might be misconfigured.If this inspection fails, perform the following steps:
- Check the
/etc/resolv.confand/etc/nsswitch.conffiles and ensure that the/etc/resolv.conffield does not contain three or more nameservers, and that the/etc/nsswitch.conffile contains themyhostnamefield under thehostsfield. - Check to see if the connections were resolved correctly. If connection to the Cloudera Data Platform console fails, check to see if your DNS wildcard is configured properly.
VersionInspectionChecks that Java is installed and consistent among all Cloudera Embedded Container Service hosts. IPTablesInspectionChecks that if the iptables command exists, rules are cleared. If the iptables command does not exist, iptables are installed during FirstRun so this inspection passes. If iptables are installed and the rules are not cleared, this inspection fails.
For information on installing iptables, see Installing iptables on the new Cloudera Embedded Container Service control plane nodes.
EcsCleanUpHostInspectionChecks to ensure that the /var/lib/rancheranddockerdata directories do not contain any files.The
EcsSystemConfigInspectioncheck is part of theHost Prerequisites Inspectionssection of install or upgrade. This check must be fixed and cannot be bypassed to continue the installation or upgrade.To fix this issue temporarily, perform the following steps:- Login to the affected host.
- Enter the following
command:
sysctl fs.inotify.max_user_instances=256
For fixing this issue permanently, perform the following steps:- Login to each affected host.
- Verify that the current configuration is
128by running the following command:cat /proc/sys/fs/inotify/max_user_instances - Edit the vi /etc/sysctl.conf file.
- Add the following contents to the end of the file and
save:
fs.inotify.max_user_instances=256 - Reload the configuration by using the following
command:
sudo sysctl -p - Verify if the configuration is updated, by using the following
command that is expected to return
256:cat /proc/sys/fs/inotify/max_user_instances
Figure 14. Check Prerequisites page with no detected issues 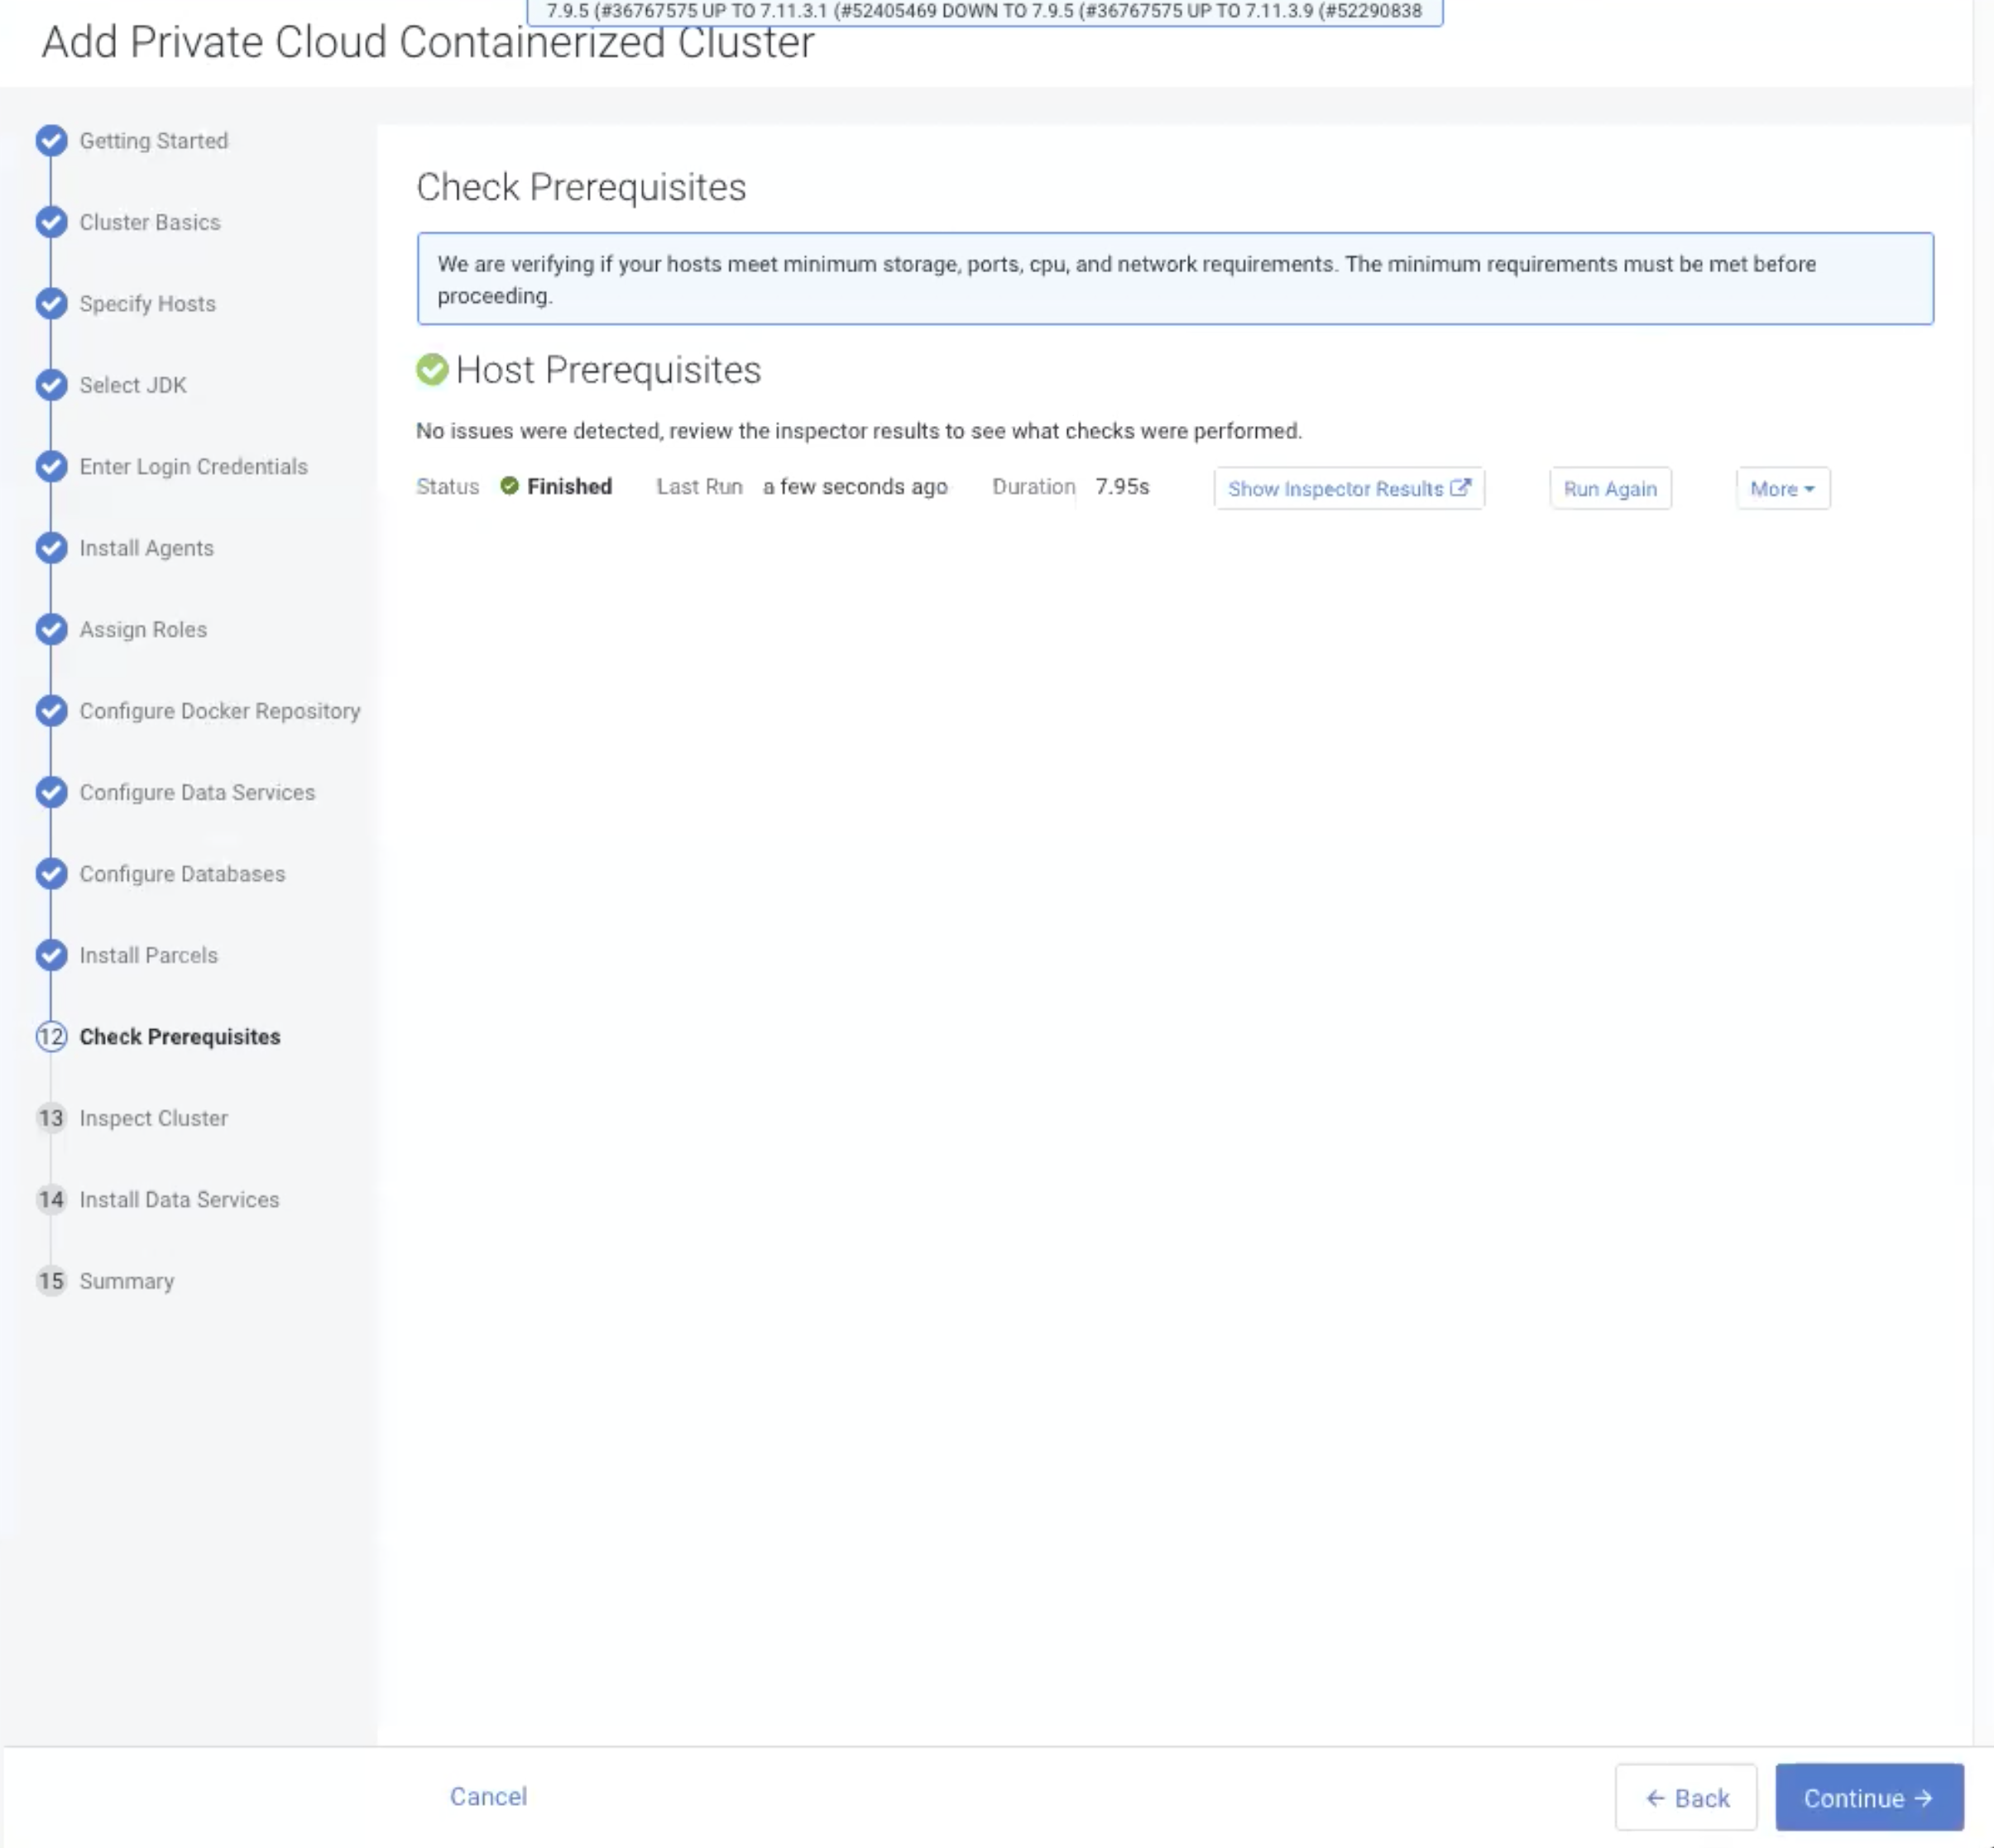
- Check the
-
On the Inspect Cluster page, click
Inspect
Cluster and Inspect Network
Performance to inspect your hosts and network performance . If
the inspection tool displays any issues, fix them and click Run
Again to rerun the inspections. After all of the issues are
resolved, click Continue.
Figure 15. Inspect Cluster page with the I understand the risks of not running the inspections or the detected issues, let me continue with cluster setup checkbox selected 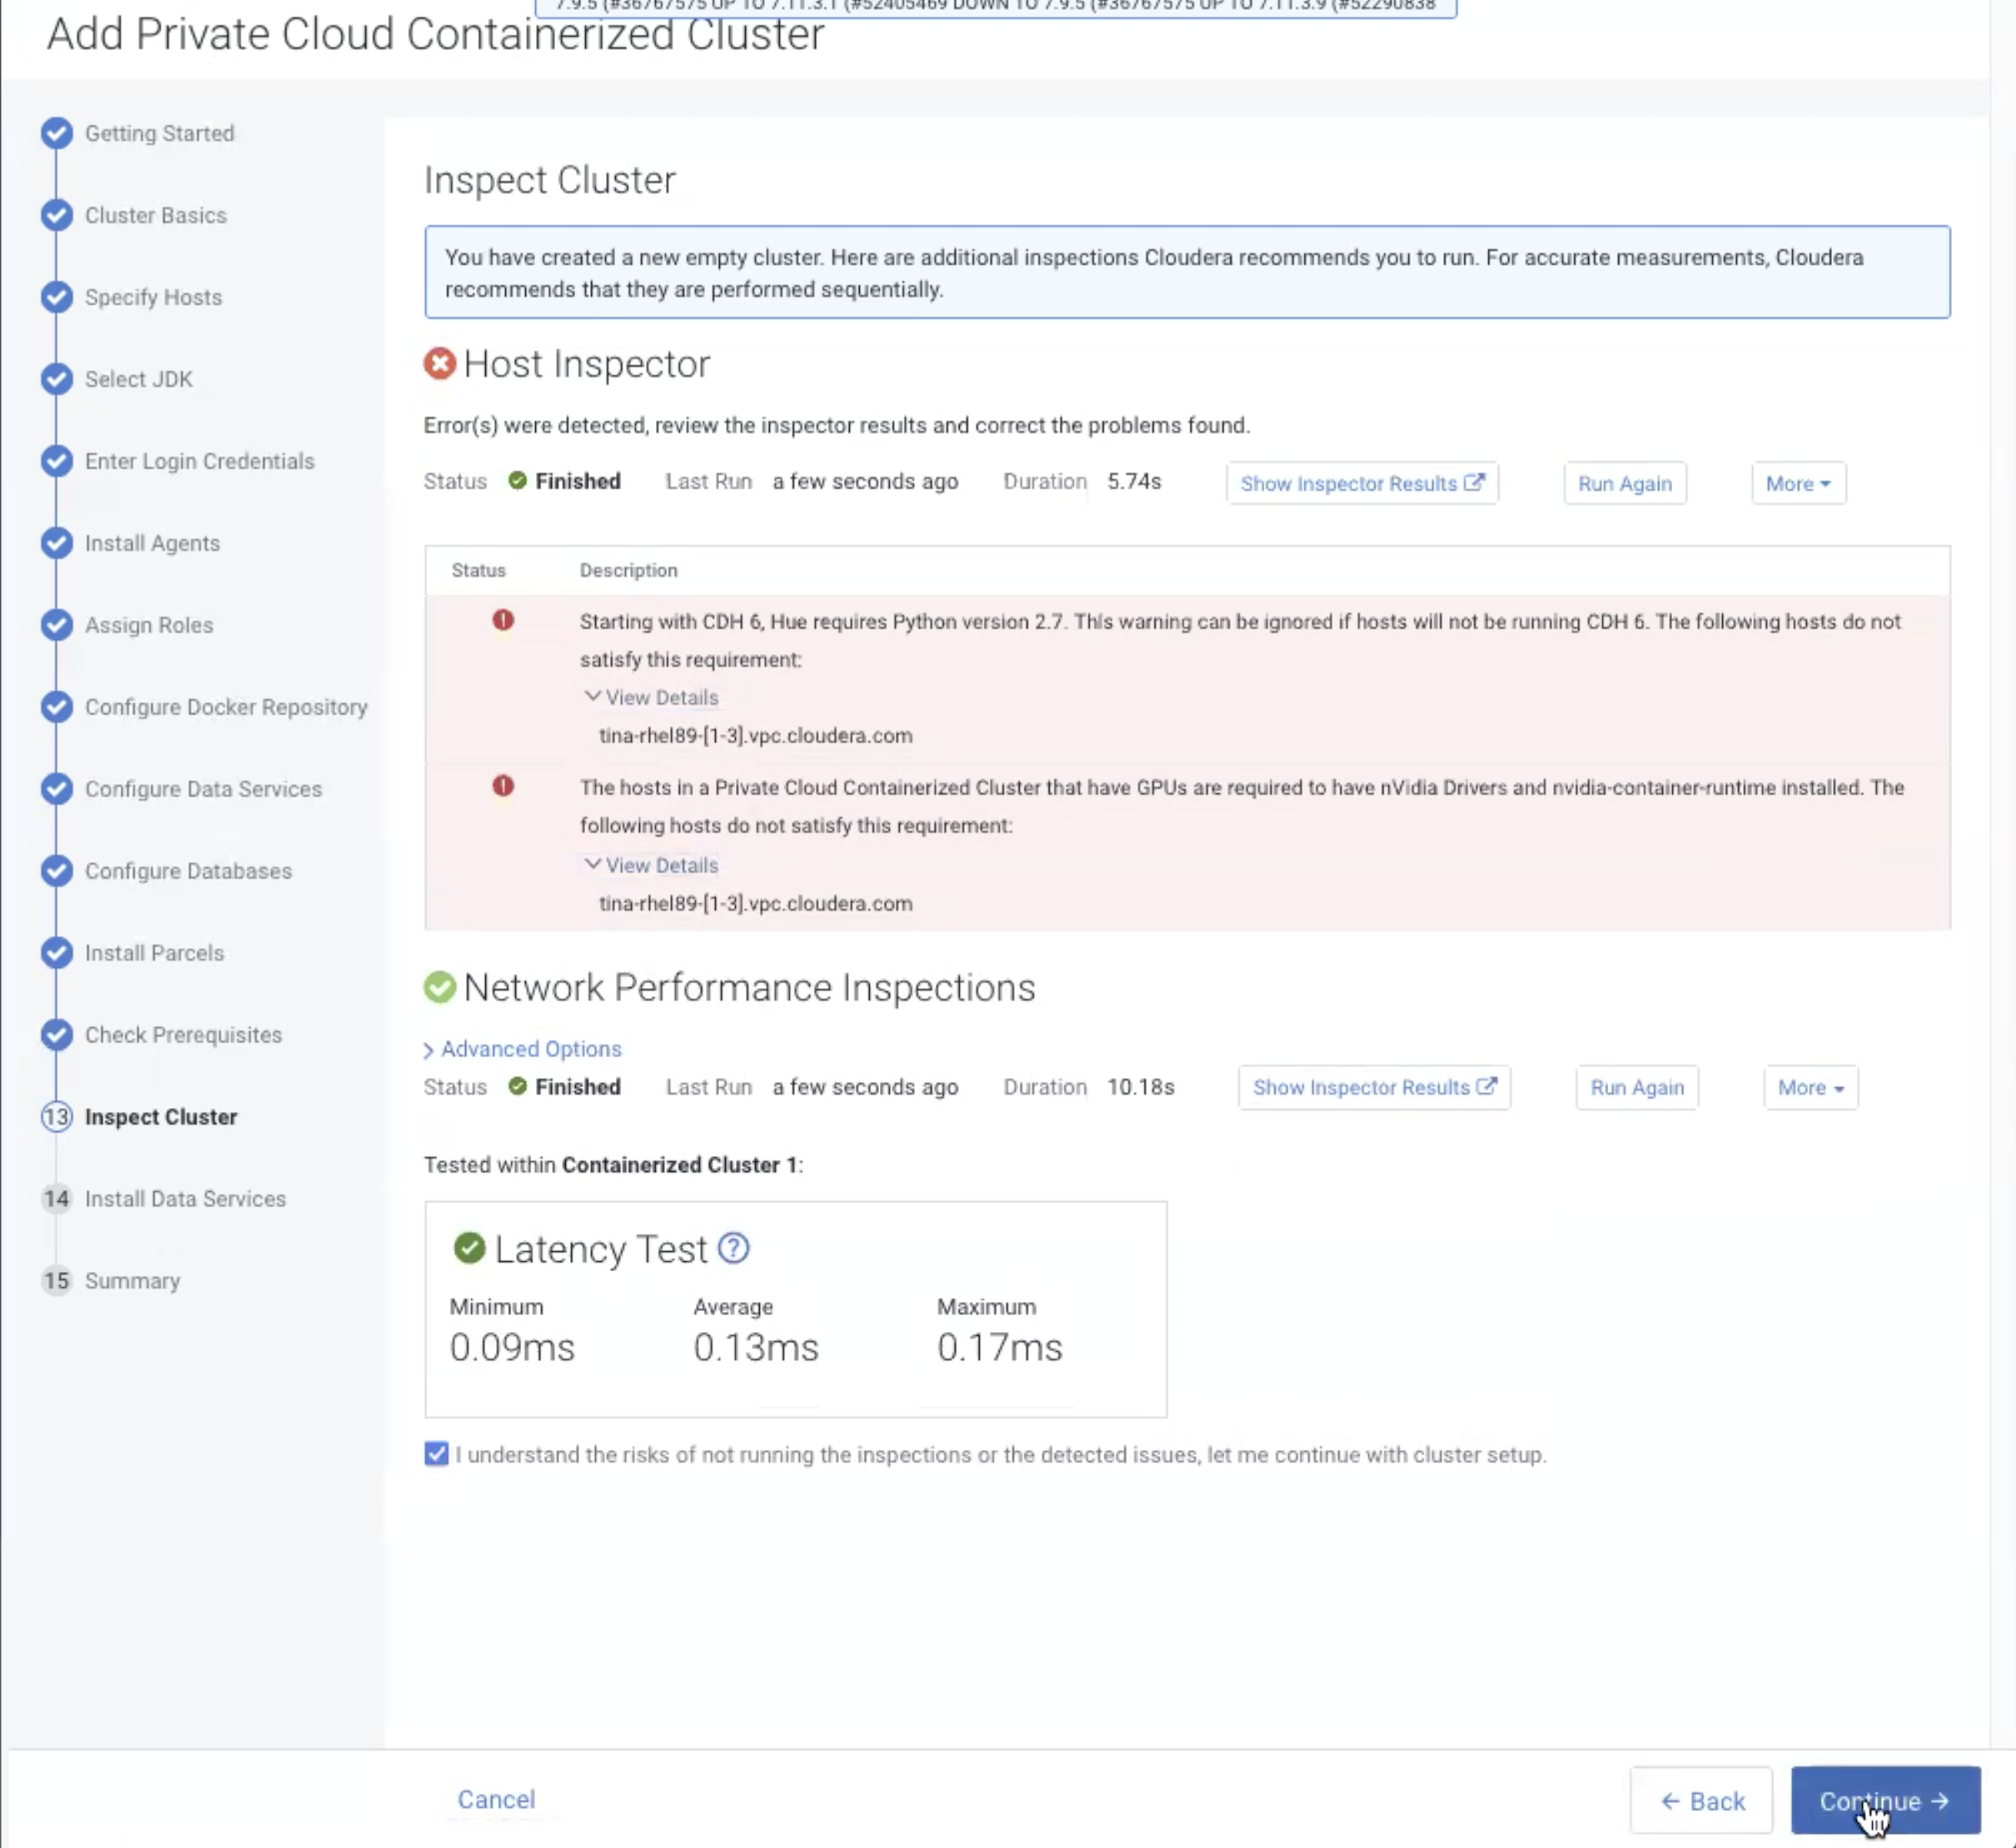
-
The Install Data Services page displays the Data
Services installation progress. When the installation is complete, click
Continue.
Figure 16. Install Data Services page with Finished status 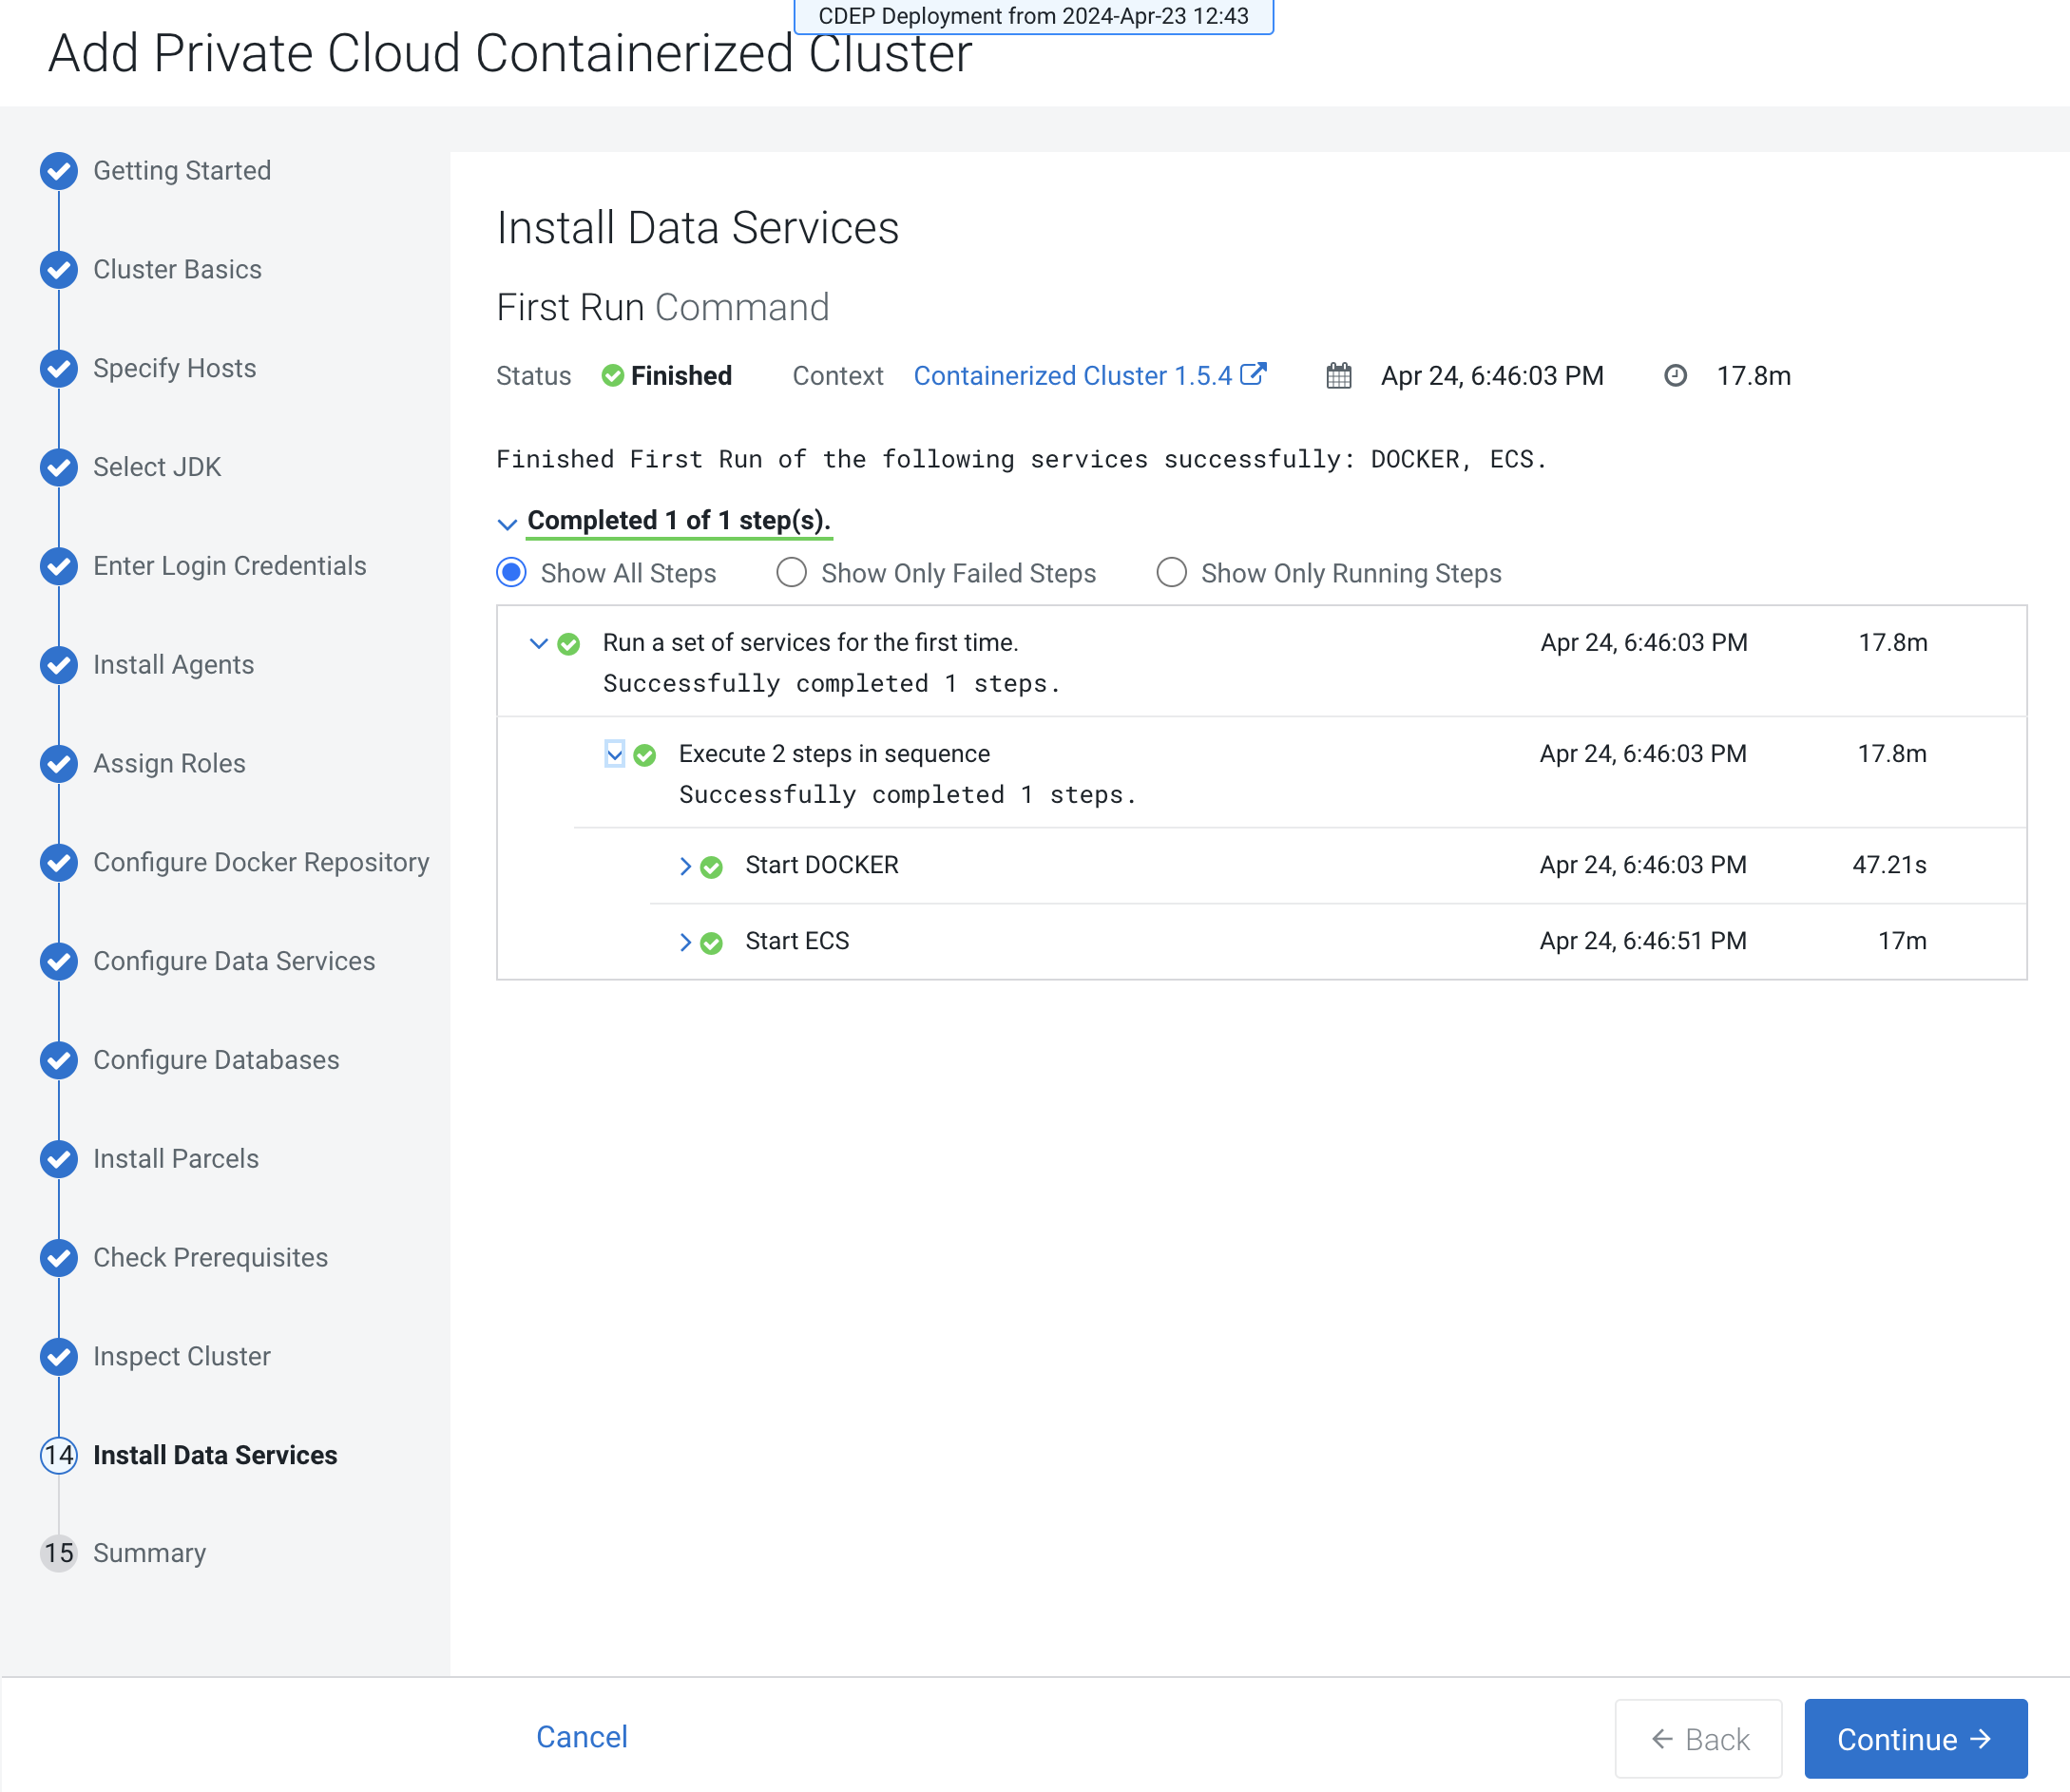
-
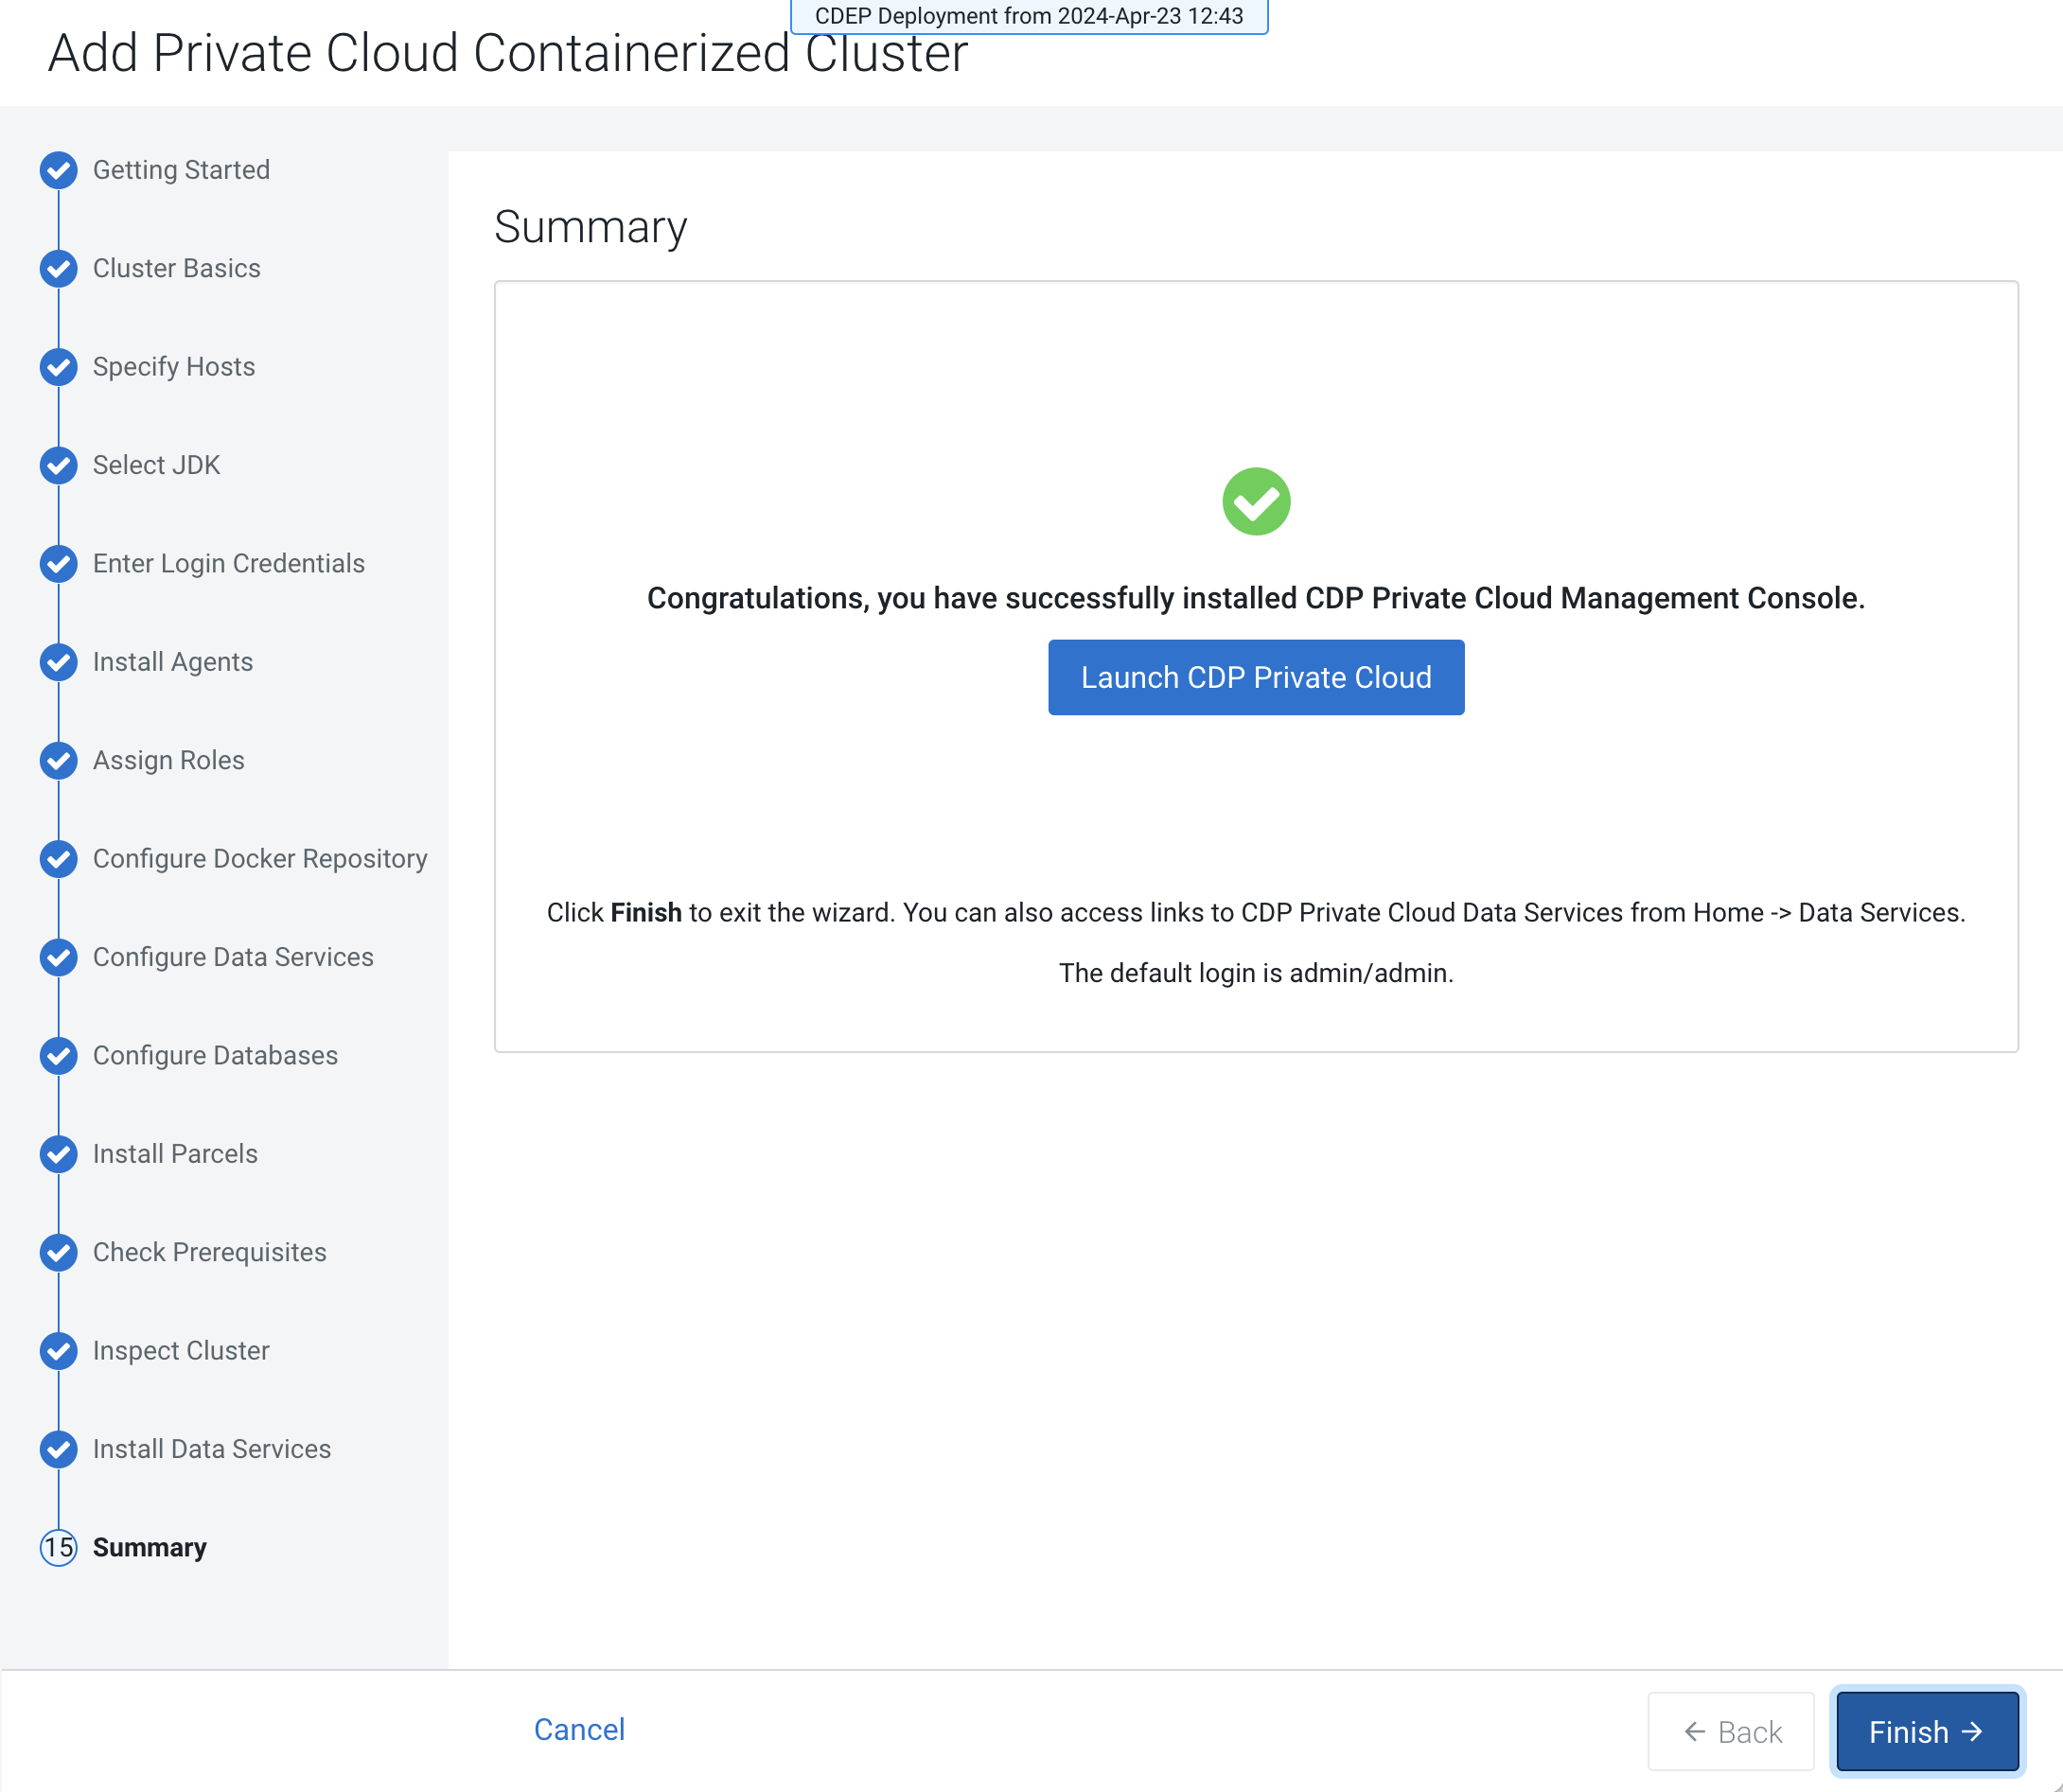
When the installation is complete, the Summary page is
displayed. Click Launch Cloudera on premises. You can also click
Finish and then access the Data Services cluster from
Cloudera Manager.
If the installation fails, and you see the following error message in the
stderr output during the Install Longhorn
UI step, retry the installation by clicking the
Resume button:
++ openssl passwd -stdin -apr1 + echo 'cm-longhorn:$apr1$gp2nrbtq$1KYPGI0QNlFJ2lo5sV62l0' + kubectl -n longhorn-system create secret generic basic-auth --from-file=auth + rm -f auth + kubectl -n longhorn-system apply -f /opt/cloudera/cm-agent/service/ecs/longhorn-ingress.yaml Error from server (InternalError): error when creating "/opt/cloudera/cm-agent/service/ecs/longhorn-ingress.yaml":
Internal error occurred: failed calling webhook "validate.nginx.ingress.kubernetes.io": Post "https://rke2-ingress-nginx-controller-admission.kube-system.svc:443/networking/v1/ingresses?timeout=10s": x509: certificate signed by unknown authority
In Cloudera Data Services on premises deployments using RKE2,
container life cycle events, such as container mounts, start, or stop, are
logged to the /var/log/messages file using
systemd.
Because the Cloudera Data Services on premises installation is
not OS-integrated, no systemd, rsyslogd,
or logrotate configurations are delivered. As a result, these
verbose messages are flooding the /var/log/messages file,
creating disk space pressure on the /var directory, which might
lead to stability or availability issues.
/var/log/messages file, consider the following logging
strategies:- Configure the following OS-level logging options for Cloudera Data Services on premises, especially for Cloudera Embedded Container Service on RKE2:
-
A sample
rsyslog.dconfiguration or journald filters to redirect container lifecycle logs to a separate file. For example, to/var/log/rancher-container-events.log. -
Safety valve-based injection method, if feasible, or post-install script guidance for these OS-level logging configurations.
-
- Alternatively, filter or rate-limit verbose lifecycle logs at the container runtime layer, if possible.
- If you specified a custom certificate, select the Cloudera Embedded Container Service cluster in Cloudera Manager, then select . This action copies the
cert.pemandkey.pemfiles from the Cloudera Manager server host to the Cloudera Embedded Container Service Management Console host. - Click Open Cloudera on premises to launch your Cloudera Data Services on premises instance.
- Log in using the previously provided username and password.
- Set up external authentication using the URL of the LDAP server and a CA certificate of your secure LDAP. Set up external authentication using the URL of the SAML and upload SAML Identity Provider Metadata file. Follow the instructions on the Welcome to Cloudera on premises page to complete this step.
- Click Test Connection to ensure that you are able to connect to the configured LDAP server.
- Create your first Virtual Warehouse in the Cloudera Data Warehouse Data Service
- Provision an Cloudera AI Workbench in the Cloudera AI Data Service
- Add a Cloudera Data Engineering service in the Cloudera Data Engineering Data Service